
Kanayama-jo (Ota city, Gunma)|The Overwhelming Presence of Its Rugged Stone Walls! — One of the “Seven Famous Castles of the Kantō”
- 1. High Up in the Mountains — Even the Drive Is Tough!
- 2. Countless horikiri—each one capable of breaking an attacking force’s spirit again and again!
- 3. A chilling sight—so striking that it makes you think, “This is what a true mountain castle looks like.”
- 4. The view from the watchtower platform is impressive as well!!
- 5. The layout of the baba (riding ground) is impressive as well!
- 6. Now, at last—through the main entrance (Ōte Koguchi) and onward to the Honmaru!
High Up in the Mountains — Even the Drive Is Tough!
Hello, I’m Shin.
On May 13, 2023, this was the second castle I visited that day.
I explored Kanayama-jo, located in Ōta City, Gunma Prefecture. 🚙
Kanayama-jo is considered one of the “Seven Famous Castles of the Kantō”, recognized as one of the region’s most notable historic strongholds.

◉ Castle Type
Mountain Castle ( Yamajiro )
◉ Cultural Heritage Highlights
◉ Defensive Features & Fortifications
◉ Exploration Difficulty
🔴 Advanced Castles
◉ Estimated Time to walk around
: 3 hours or more
◉ Parking
Approximately 10 parking spaces are available in front of the Kanayama Castle Ruins Observation Deck⛰️
About a 15-minute taxi ride from Sanmaibashi Station on the Tobu Kiryu Line🚃
During the Sengoku period, Kanayama-jo stood at the center of shifting power struggles.
Uesugi Kenshin advanced into the Kantō region at the request of the Yamanouchi Uesugi clan, while the Hōjō clan sought to bring the region under its control.
Caught between these forces was the lord of Kanayama-jo, Yura Shigenari (also known as Yokose Shigenari).
At times, the castle defended itself against the armies of Uesugi Kenshin.
It was later attacked by Takeda Katsuyori, and ultimately, it was forced to surrender to the Hōjō clan.
Kanayama-jo was truly a stronghold shaped—and shaken—by the turbulent currents of its era.
As you can see on Google Maps,
reaching the observation deck on the left requires driving up a series of sharp hairpin turns!
That alone tells you how elevated this mountain castle truly is.
In fact, while driving up, I honestly felt a bit nervous—it had been a while since I’d experienced such a steep and winding ascent. 😅
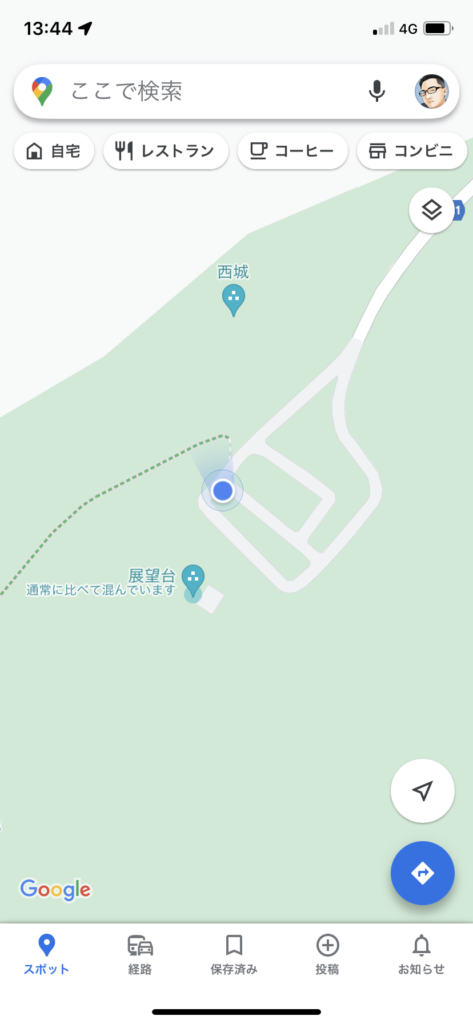
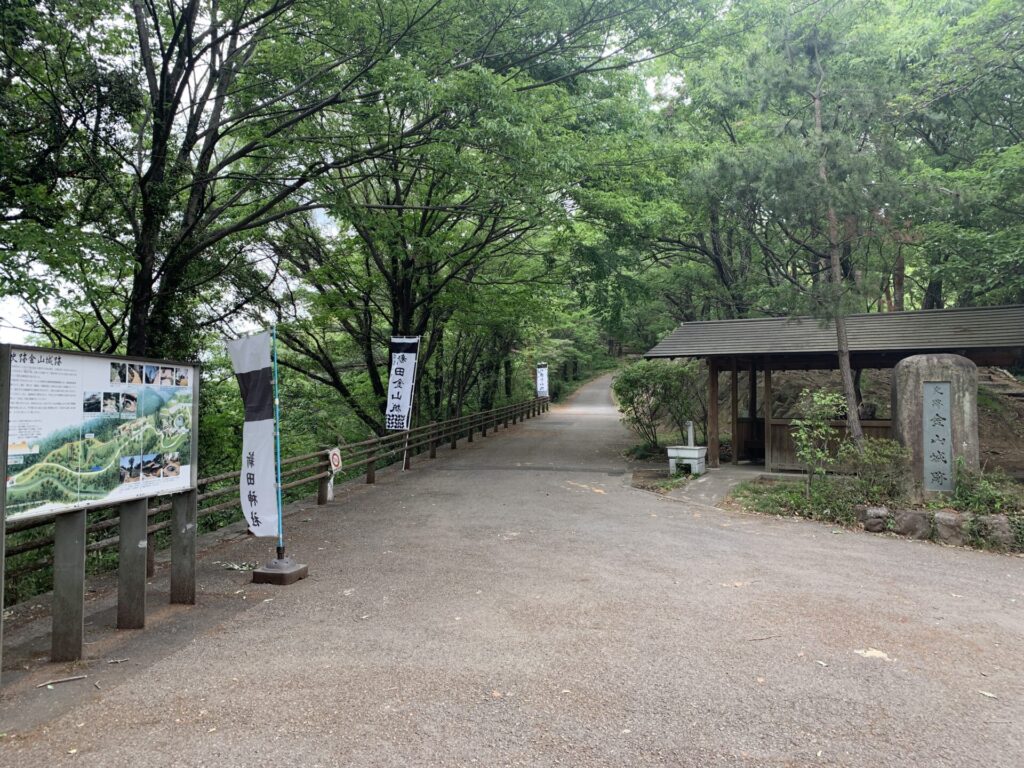
There is parking space for about ten cars just before the observation deck.
From there, you’ll leave your vehicle behind and begin exploring the castle on foot.
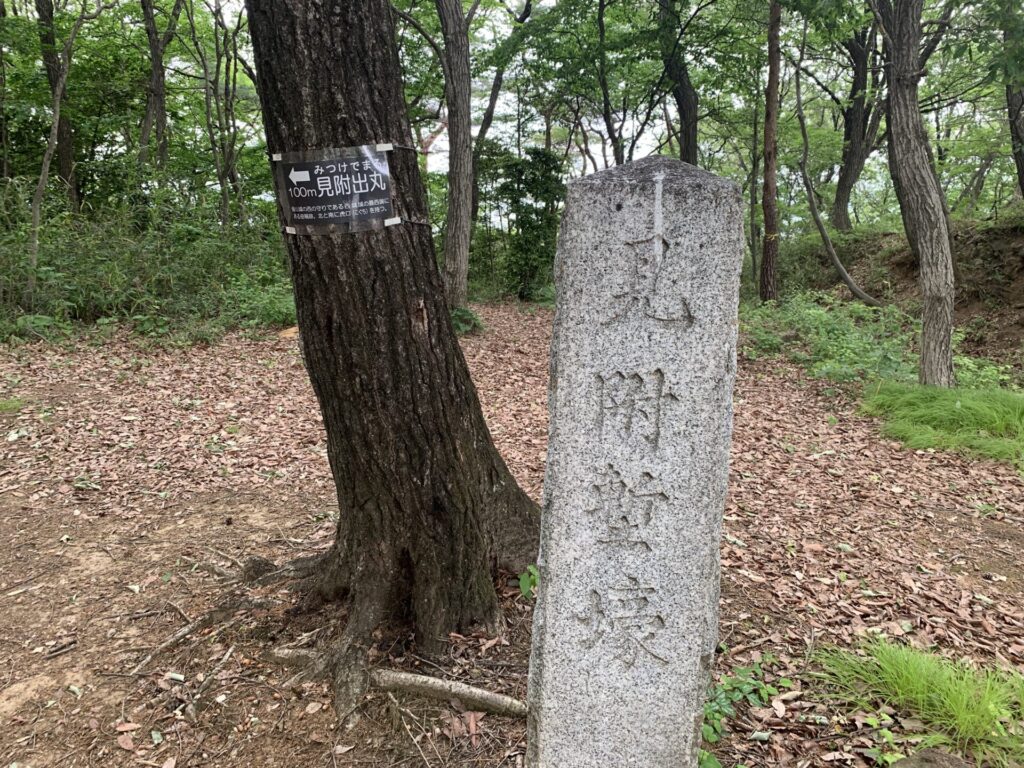
As soon as you step onto the well-maintained mountain path near the observation deck,
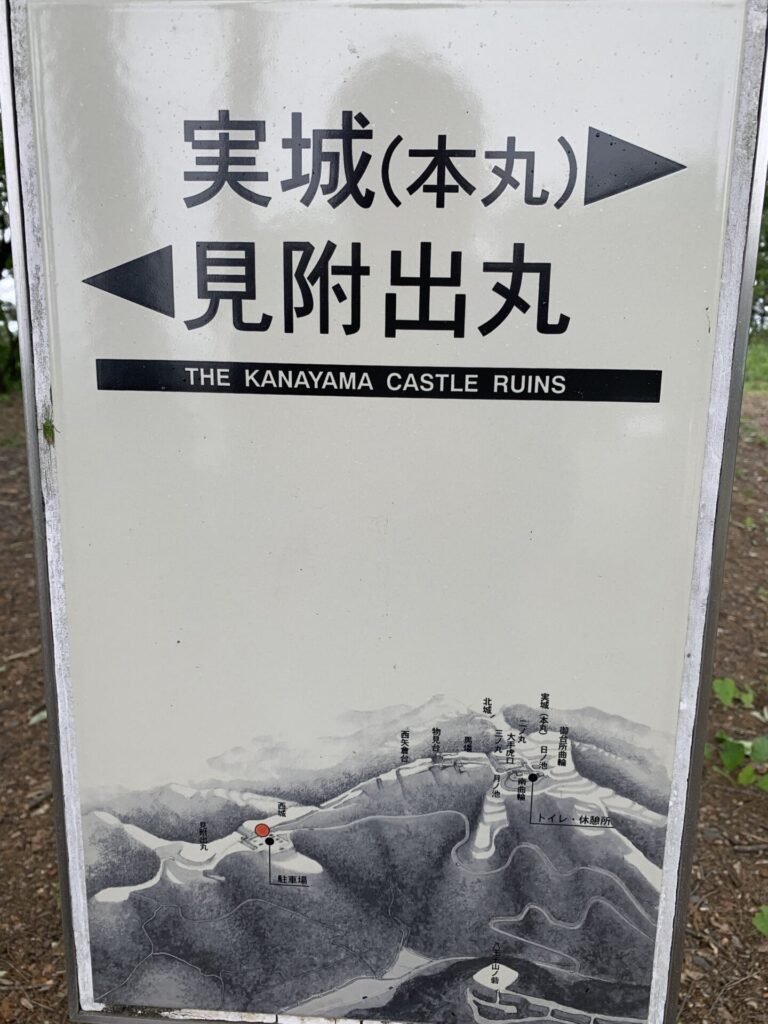
you’ll notice a sign on a tree reading “Mitsuke Demaru”(見附出丸).
Let’s begin our exploration from here!
“Mitsuke Demaru”(見附出丸) is about 100 meters from here.
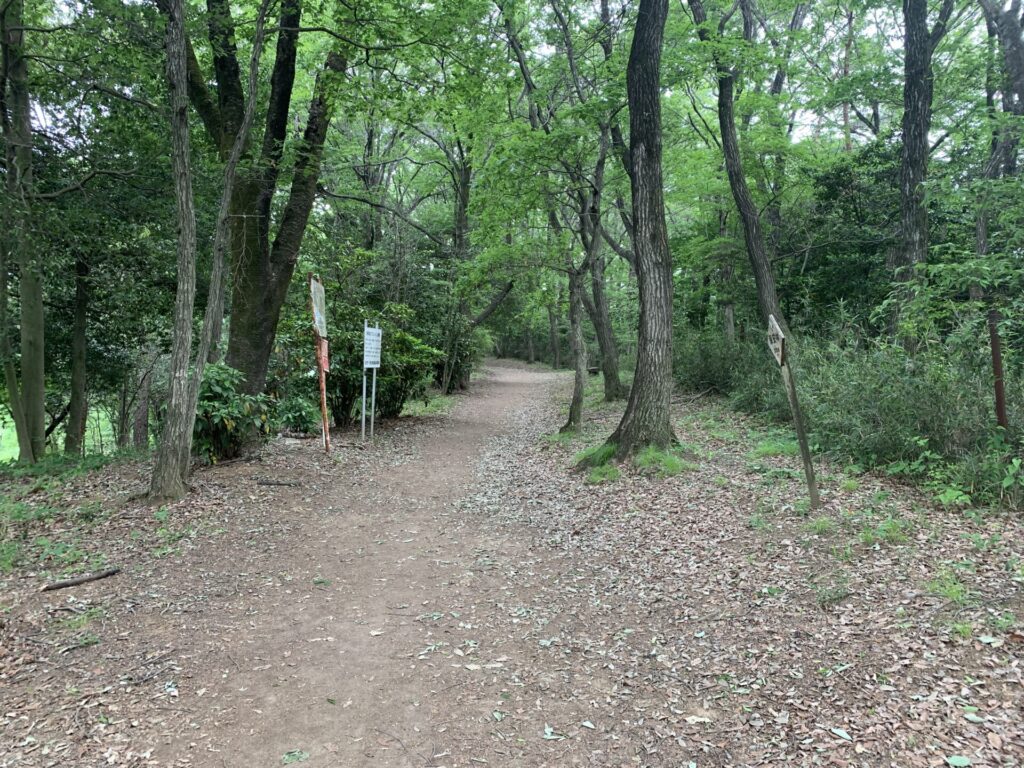
As you can see, the path is well-maintained and easy to walk.
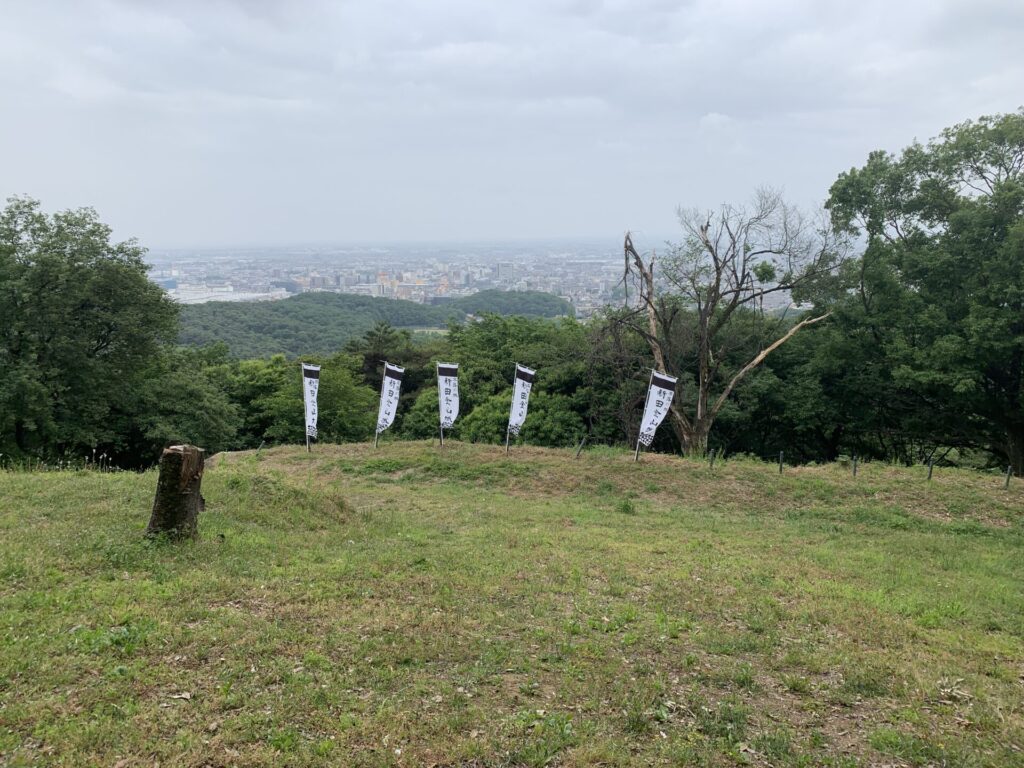
The view suddenly opens up.
From here, you can enjoy a sweeping panorama of Ōta City in Gunma Prefecture.
Even this vantage point alone makes it clear just how high this mountain castle stands.
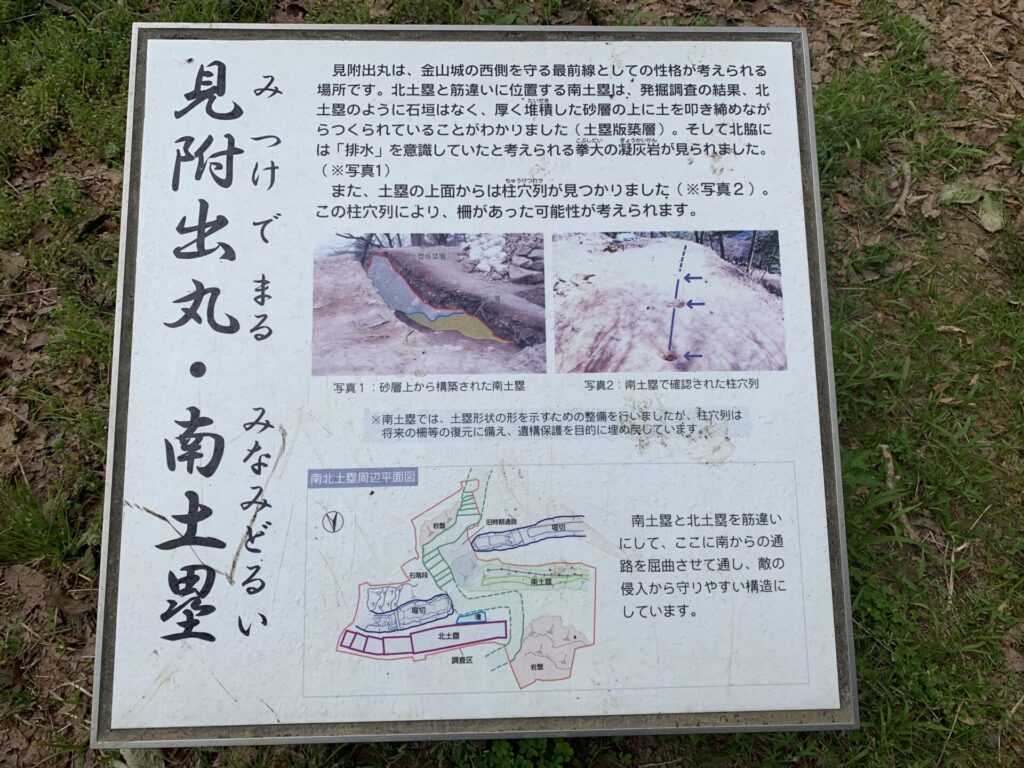
This area is known as the “Mitsuke Demaru”(見附出丸), and you can also see traces of Dorui (土塁:earthen ramparts) here.
Now, let’s take a short video to get a closer look at this spot.
In the latter part of the video, you can clearly see the shape of a horikiri (堀切:ridge-cut moat).
A horikiri is a defensive feature created by cutting straight across a mountain ridge, preventing enemy troops from advancing easily along the ridgeline.
It is one of the most typical defensive structures found in mountain castles.
Countless horikiri—each one capable of breaking an attacking force’s spirit again and again!
We’ve taken a look at the overall layout of the “Mitsuke Demaru”(見附出丸).
Now, let’s head back along the path we came from and continue toward the Honmaru (本丸:main enclosure).
As we make our way back along the path,
it becomes clear that the Honmaru lies much deeper inside the mountain.
Looking at this layout map, you can’t help but think, “Yes—this is truly a mountain castle!”
That distinctive silhouette is something castle enthusiasts can’t resist. 😅
We’ll be climbing further up along this mountain path.
It’s hard not to feel excited.✊
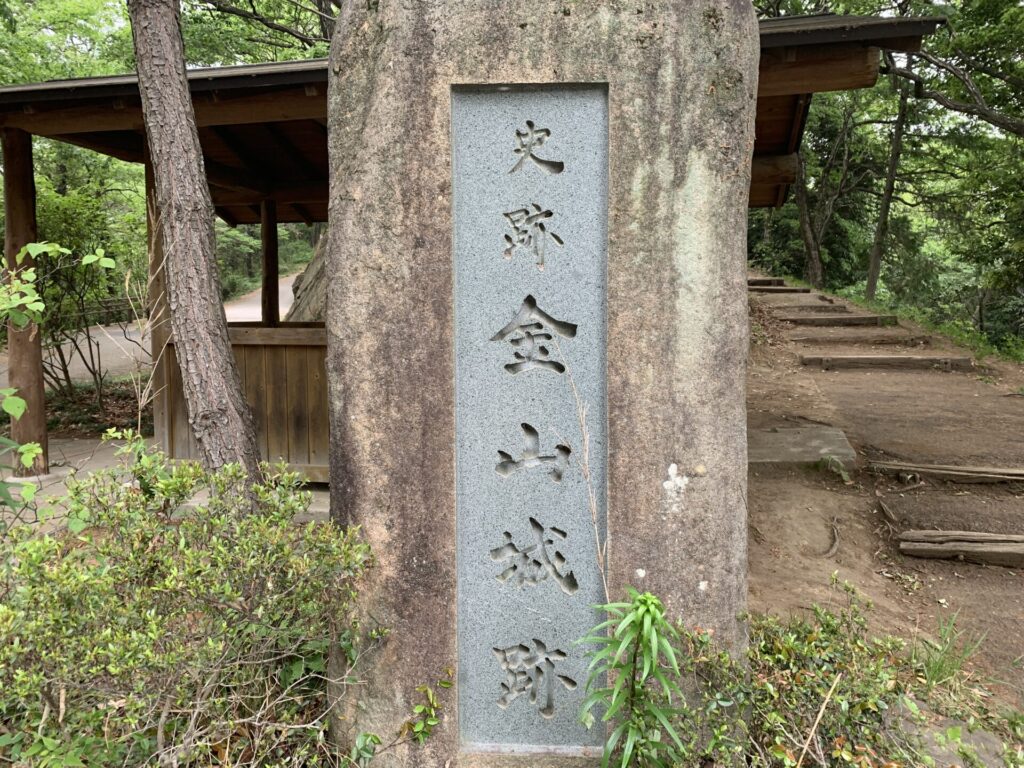
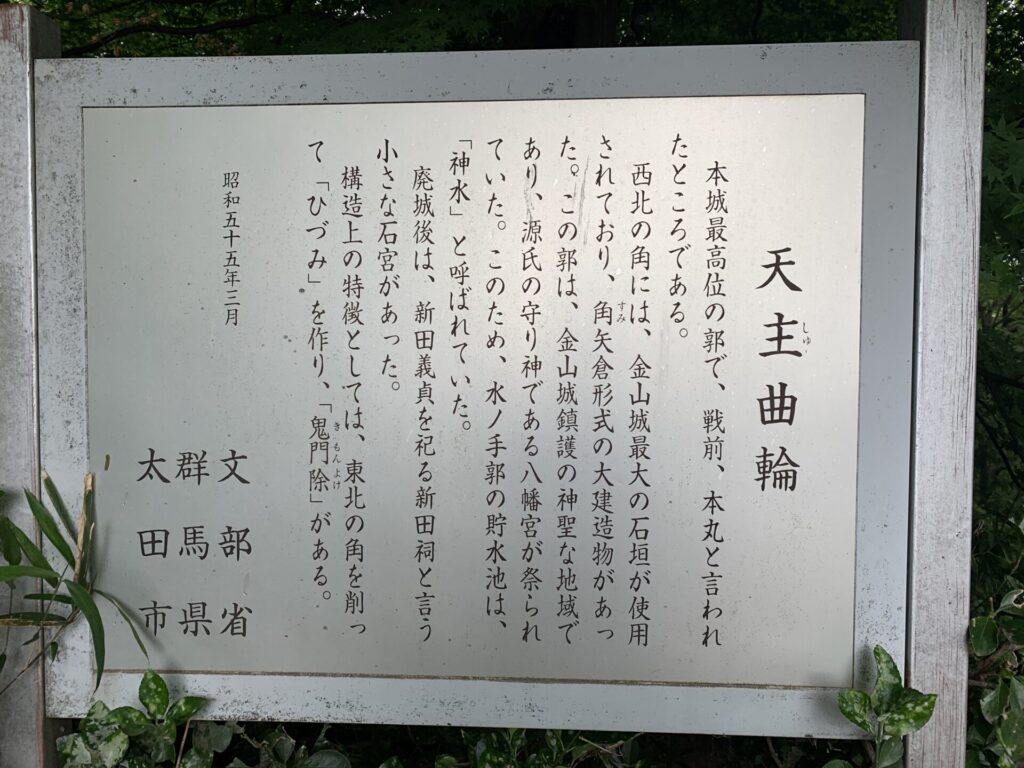
Here stands the stone monument marking the site of “Kanayama-jo”.
To be honest, when I first decided to visit, I hadn’t researched much about the castle’s history.
I was simply drawn to it because of its impressive defensive layout.
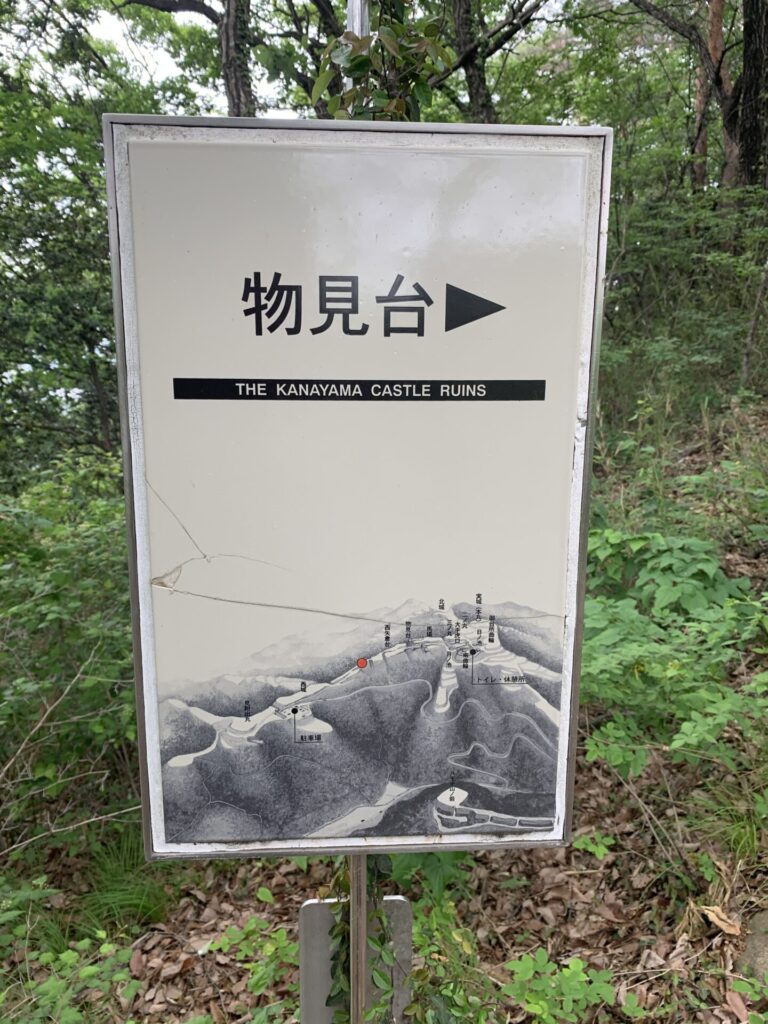
As we climb a little higher, we see a sign pointing to the ”Monomidai”(物見台:watchtower).
Before heading to the Honmaru, let’s take a look there first.
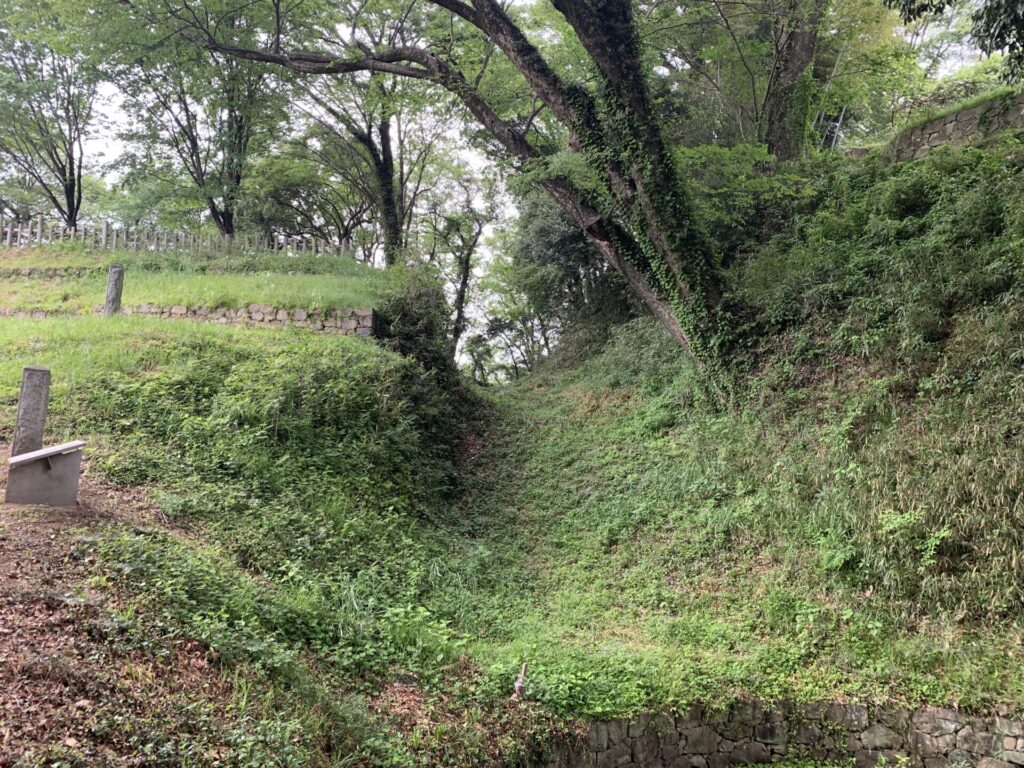
And on the way to the watchtower—another horikiri(堀切) was waiting for us!!
Well, of course…
A mountain castle wouldn’t make things easy.
That’s exactly what you’d expect from a true Yamajiro(山城)!
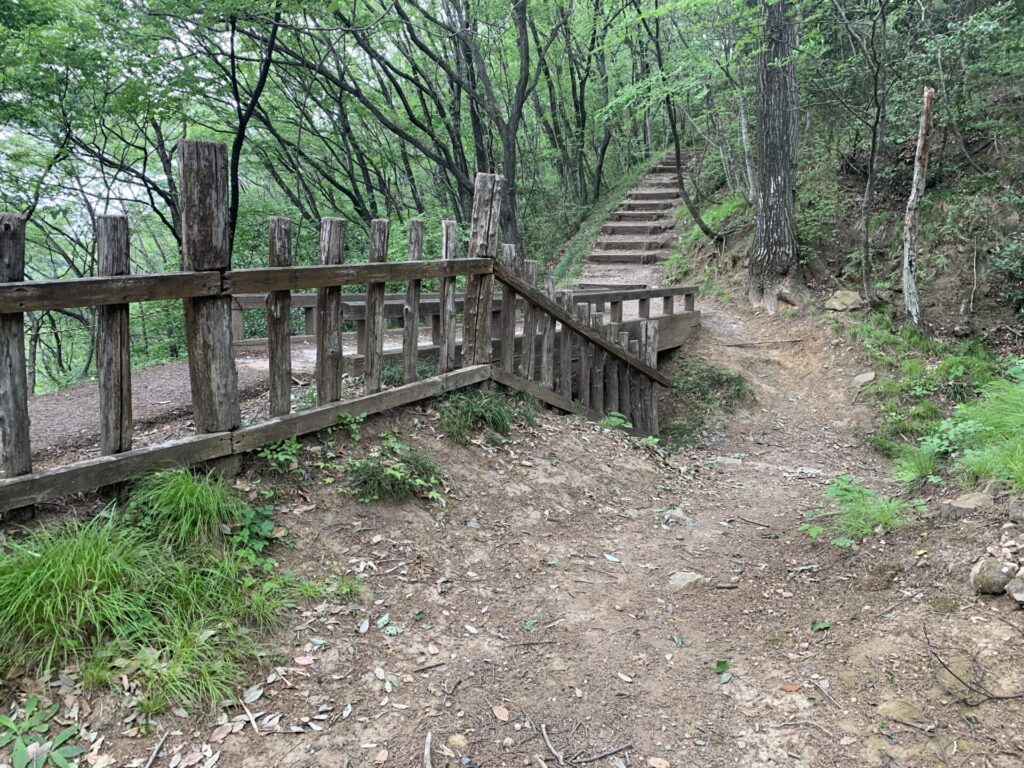
This is the bridge that crosses the horikiri(堀切).
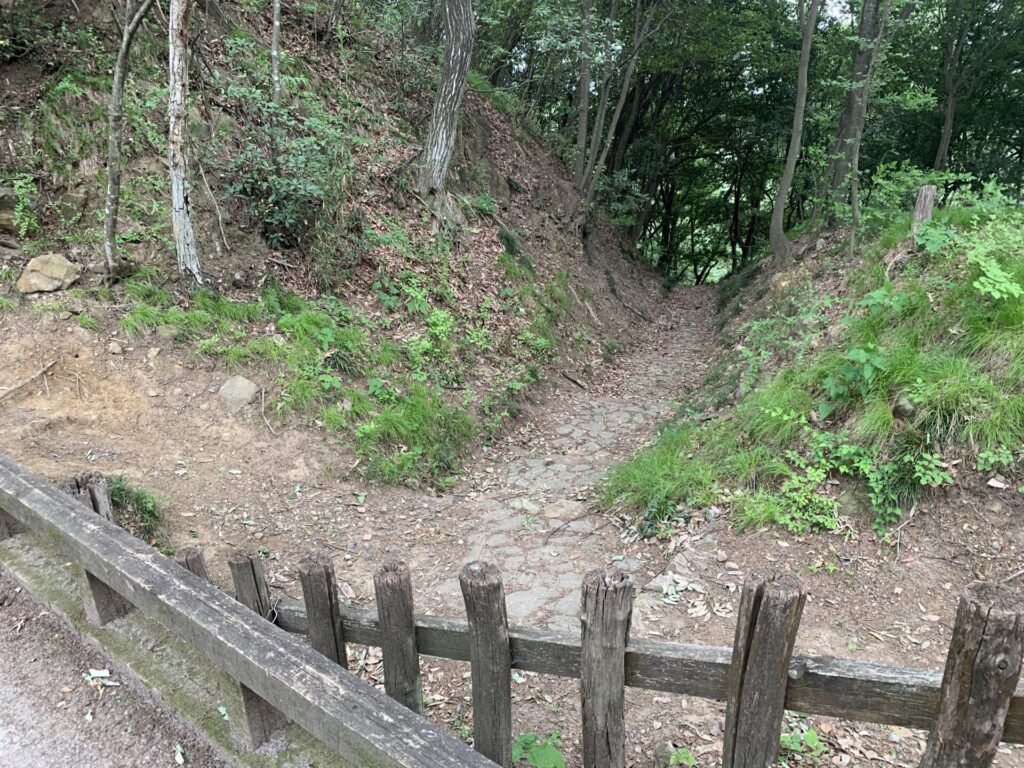
This sharply carved-out space is the horikiri(堀切).
In this photo, even if attackers tried to advance from the right side toward the left, the ridge is cleanly cut by this deep trench, making it difficult to continue toward the Honmaru.
Now, please take a look at a short video showing this area in more detail.
In fact… the horikiri(堀切) continues even further.
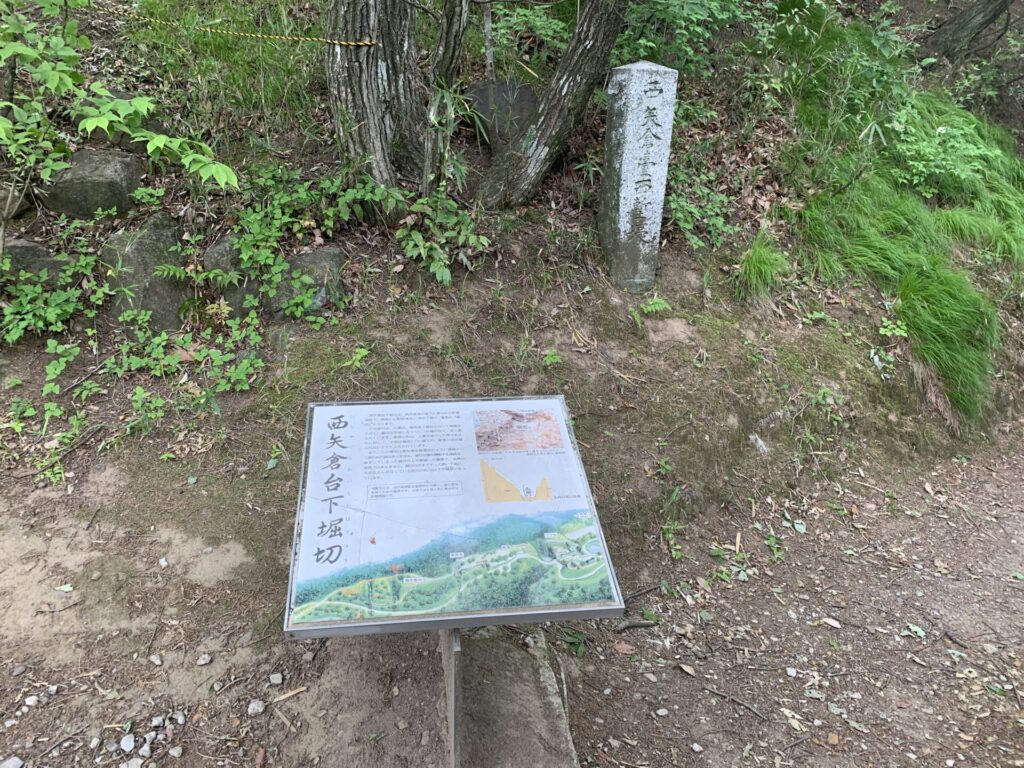
After walking a bit further, we encounter yet another one!
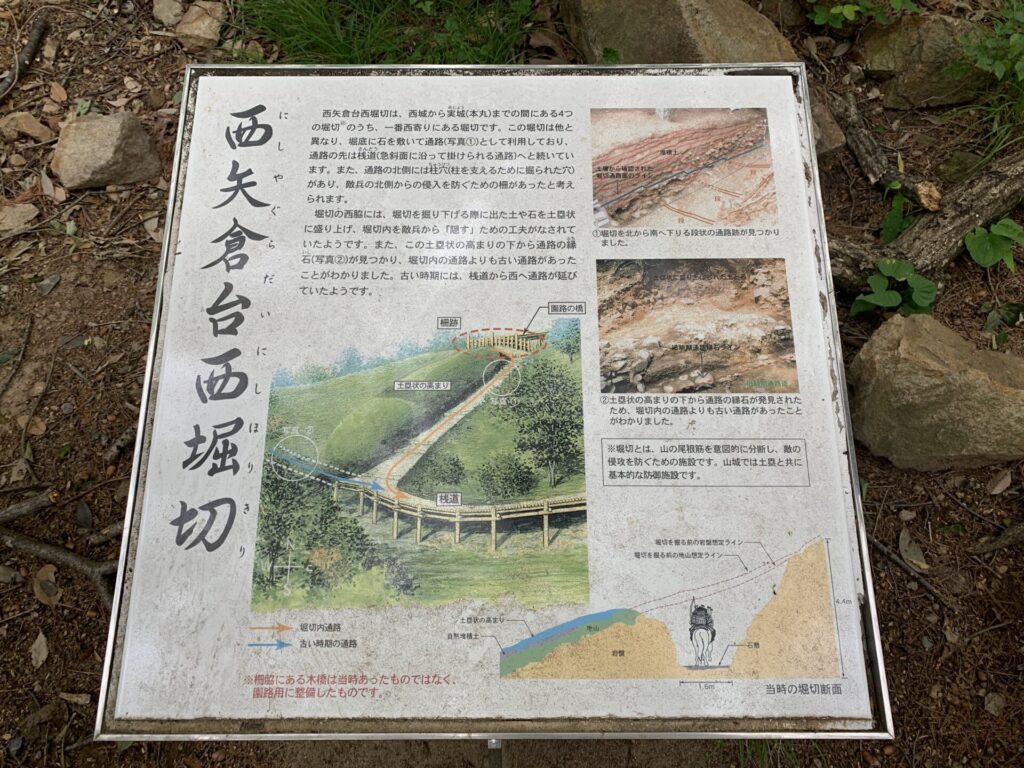
This time, a sign reads “Nishi Yaguradai-shita Horikiri”(西矢倉台下堀切) — the ridge-cut moat below the West Turret Platform.
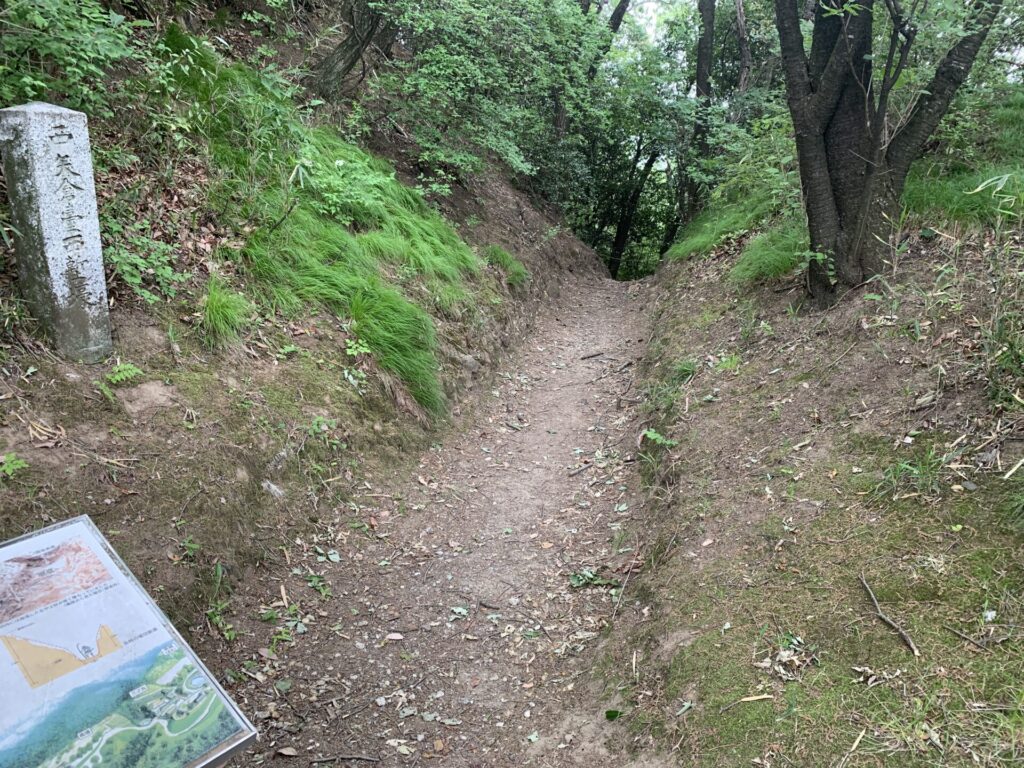
Here again, as you can see, the horikiri(堀切) is clearly visible, cutting sharply across the terrain.
The defenses are truly formidable.
This is the true power—and intimidation—of a mountain castle!!
A chilling sight—so striking that it makes you think, “This is what a true mountain castle looks like.”
After passing through two horikiri,
you can’t help but wonder—what will be waiting ahead next?
With that anticipation, I continued along the path…
The next thing that came into view was this.
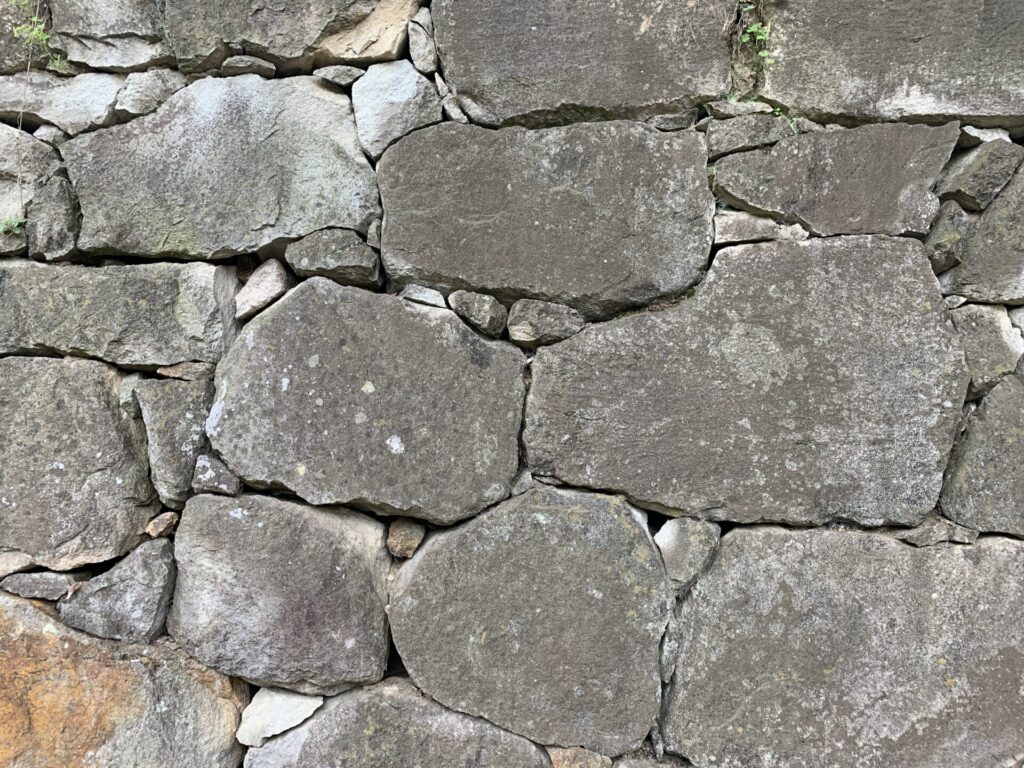
The stone-paved passage is deliberately concealed from attackers approaching from the lower right, while the imposing stone walls rise up to confront and intimidate them.
It is an astonishingly formidable design.
Kanayama-jo is counted among the “Seven Famous Castles of the Kantō”, and for good reason.
—stone walls of this scale are said to be quite rare in the Kantō region !!
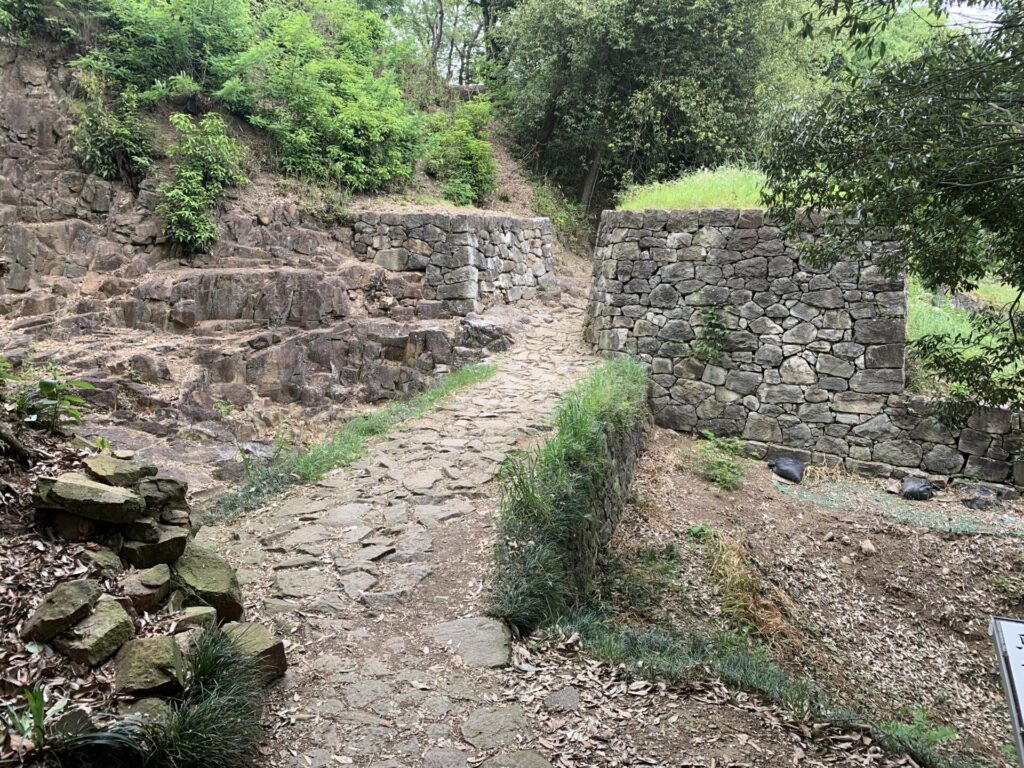
This is the passage lined with stone walls.
And of course, here is a short video so you can see it more clearly.
The rugged rock surfaces and massive stone walls press in on you—almost as if to say, “Is this enough to intimidate you?”
This is far removed from the kind of castle visit centered around a grand and elegant tenshu tower.
This… is what a true mountain castle looks like.

Here is a photo taken from the rear side.
Remarkably rugged… and powerful.
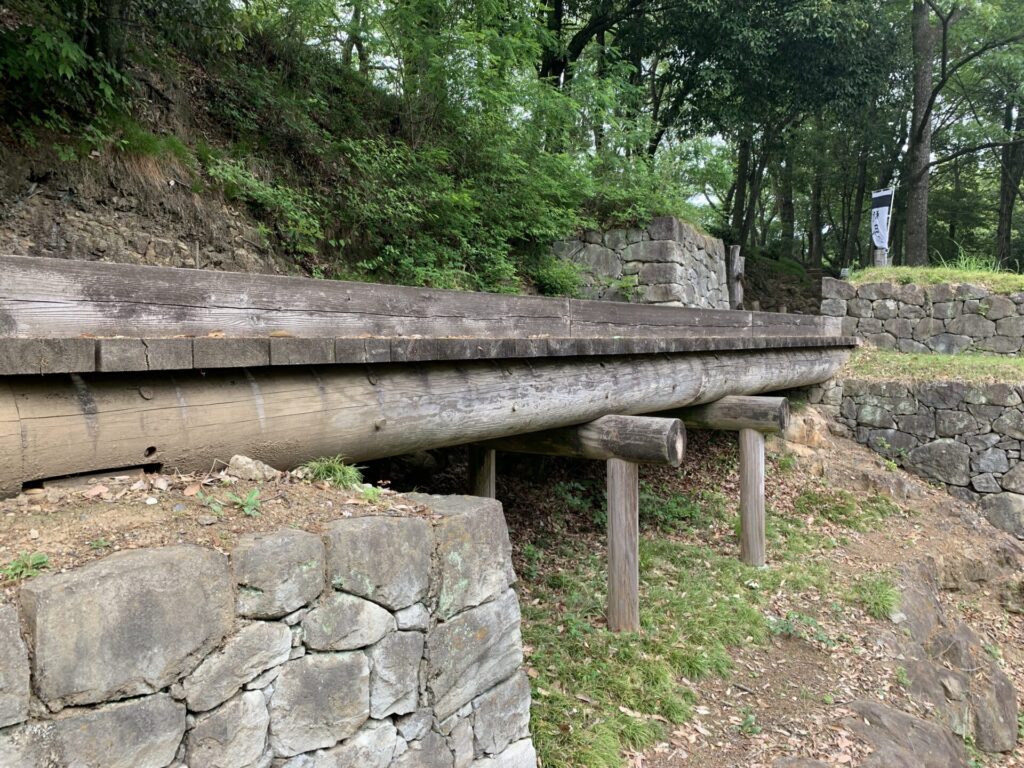
Crossing this wooden bridge, we head toward the central area of the castle.
I also captured a short video of this section—please take a look.
Beneath this wooden bridge lies a deep ravine,
making it clear that attacking from below would have been no easy task.
After crossing the bridge, we continue climbing further into the castle.
The view from the watchtower platform is impressive as well!!
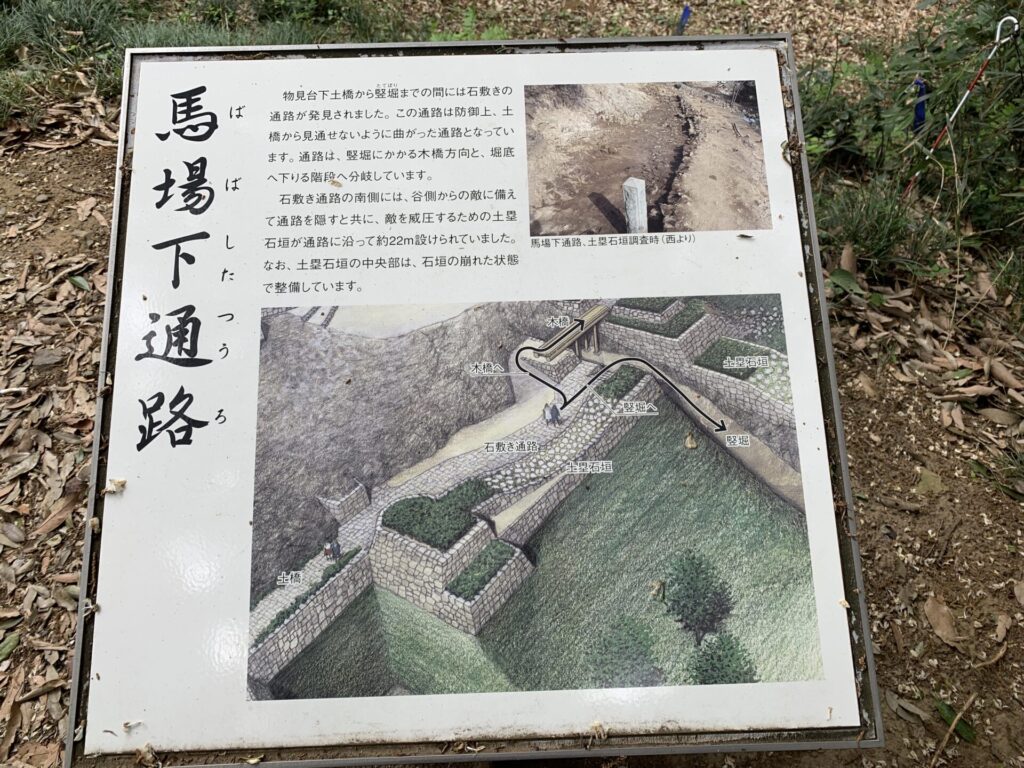
After crossing the wooden bridge and proceeding along the “Baba-shita Passage”(馬場下通路),
you’ll come across a sign like this!
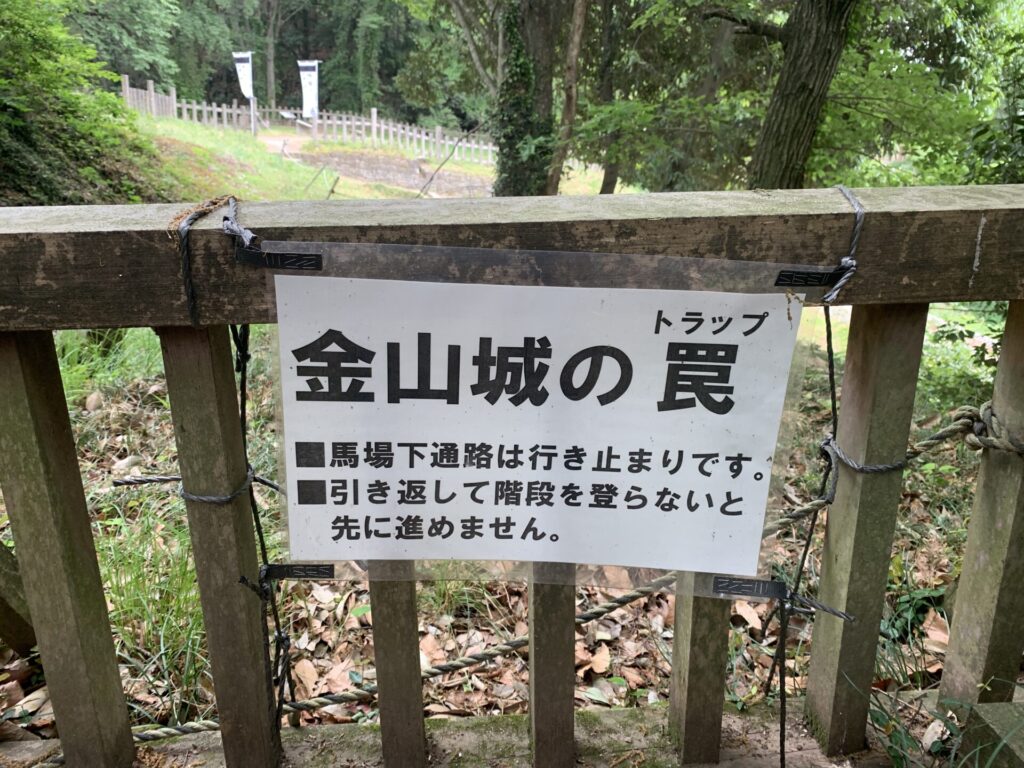
“You cannot proceed unless you turn back and climb the stairs.”
Well, that makes sense…
But the phrase “Kanayama Castle’s Trap” gave me a slight chill—while at the same time making me smile a little.
It left me with a strangely mixed feeling. 😅
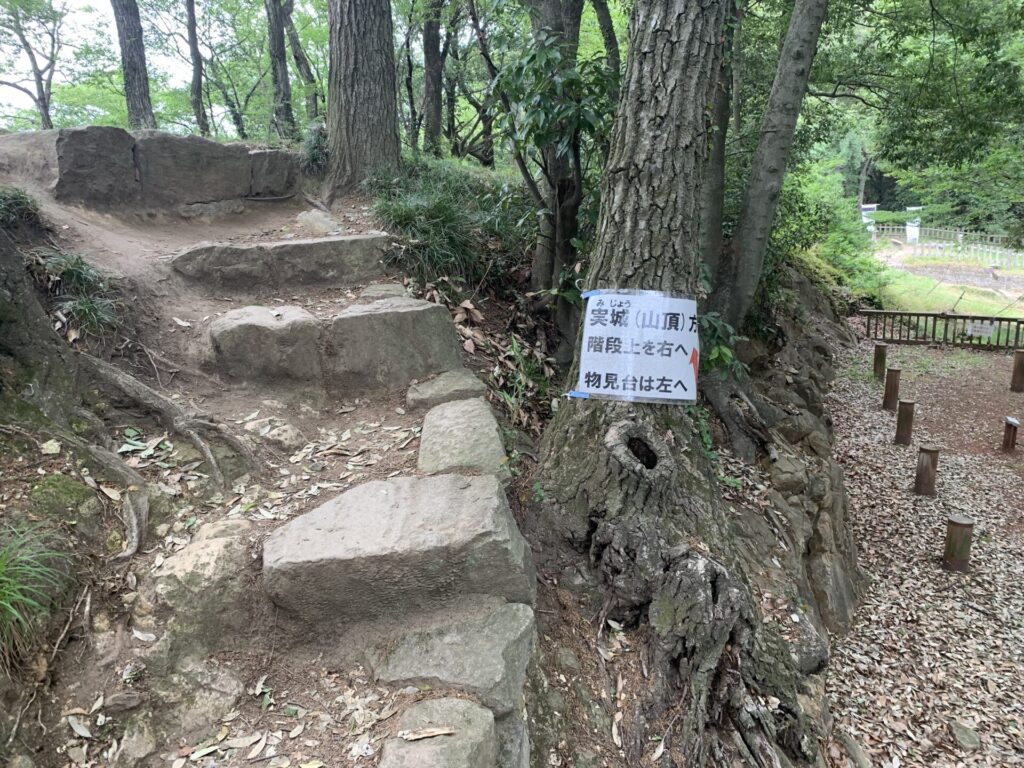
Climbing these stone steps, the path to the right leads toward the Honmaru(本丸)—the central area of the castle—while the path to the left heads to the watchtower platform(物見台櫓).
Let’s start by exploring the watchtower side first. ✊
After climbing the stone steps and turning left,
there it was—the watchtower platform straight ahead!
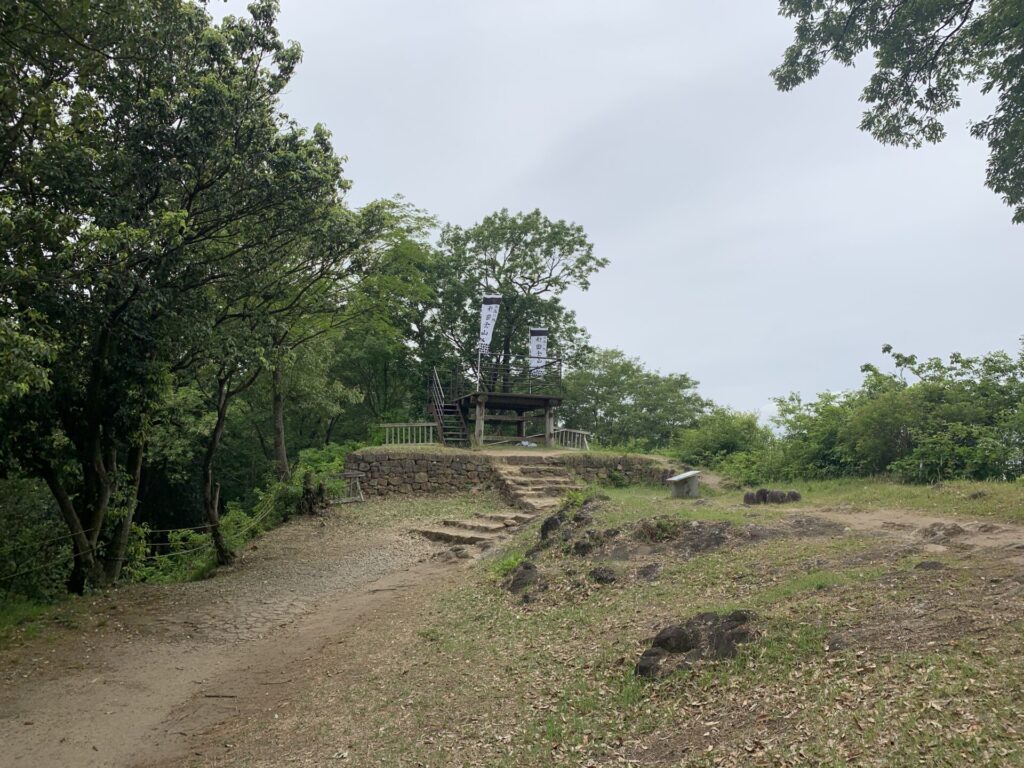
It’s a very simple structure,
but that simplicity actually makes it feel more authentic and realistic. ✨
Please watch the video to see what it’s like to climb up to the watchtower.
Just below the watchtower platform, you can see the Baba-shita Gate(馬場下通路)we passed earlier.
And the panoramic view of the city from here is impressive as well.
From this vantage point, defenders would have been able to spot approaching enemy forces at a glance.
The layout of the baba (riding ground) is impressive as well!
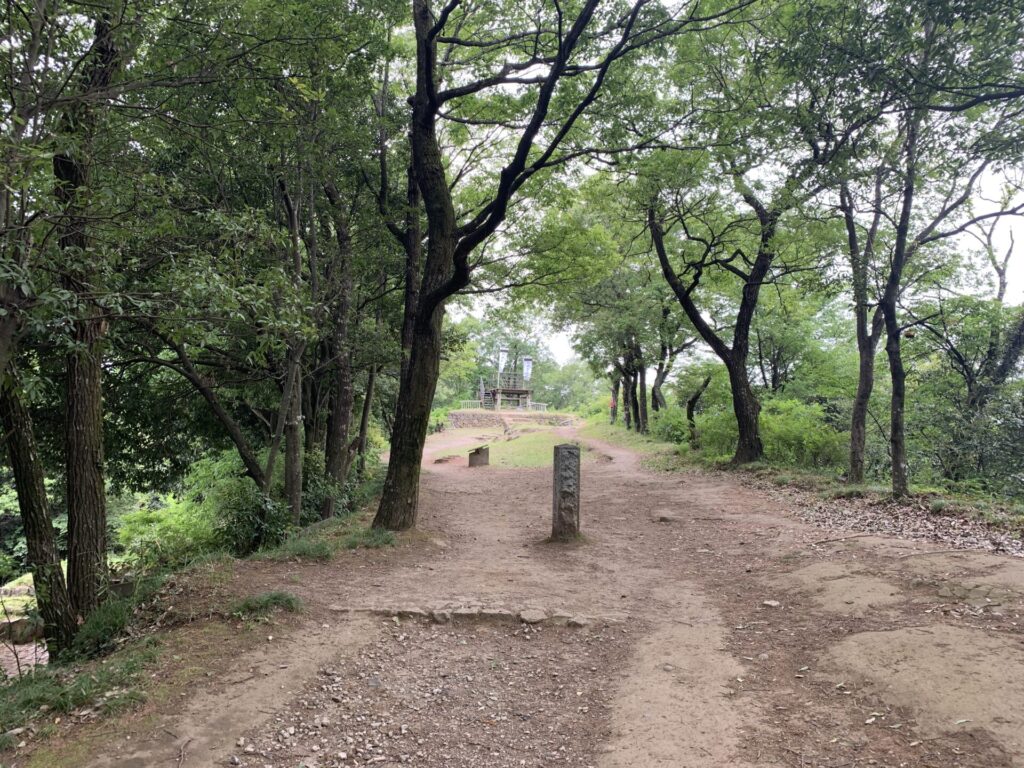
After enjoying the view from the watchtower platform(物見台櫓),
it’s time to move on toward the Honmaru(本丸). 🚶

Heading in the opposite direction from the stone steps we saw earlier,
it looks like there is another baba (馬場:riding ground) ahead.

This appears to be the baba(馬場).
Compared to the castles I’ve explored so far, this may be the first time I’ve seen such a well-defined and clearly preserved riding ground.
Or rather—what a surprise!
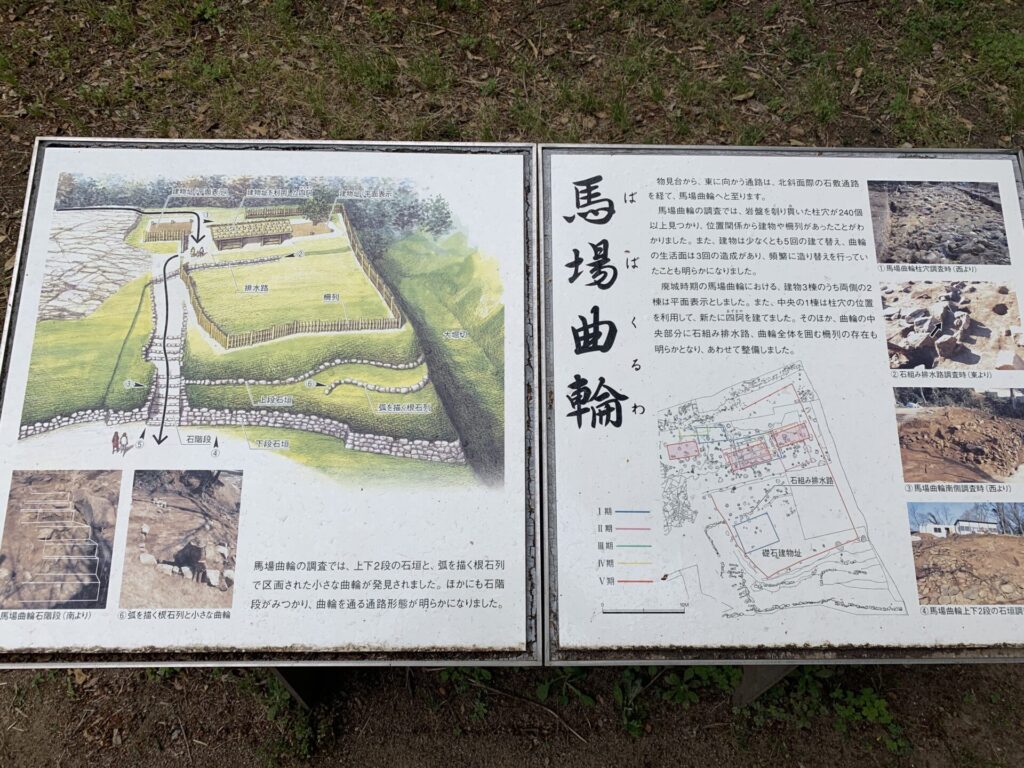
It turns out this was not just a riding ground, but a Baba Kuruwa(馬場曲輪)—a riding ground that itself functioned as an enclosure.
The idea that the baba was integrated into the defensive layout as a kuruwa is fascinating.
Indeed, with the series of stone steps and layered terrain, this area clearly served as part of the castle’s defensive system !!
Another valuable lesson learned.
Just seeing this Baba Kuruwa gives you a sense of how expansive and strategically designed Kanayama-jo truly was.
Now, please watch a short video showing the full layout of the Baba Kuruwa.
It has a considerable amount of space,
and as you can see, a large horikiri(堀切) runs along the outer edge of the enclosure.
There doesn’t seem to be a single point that would have been easy to attack.
Incredible… it feels almost too well-fortified.
How would anyone even begin to assault a castle like this?
Another surprising discovery—
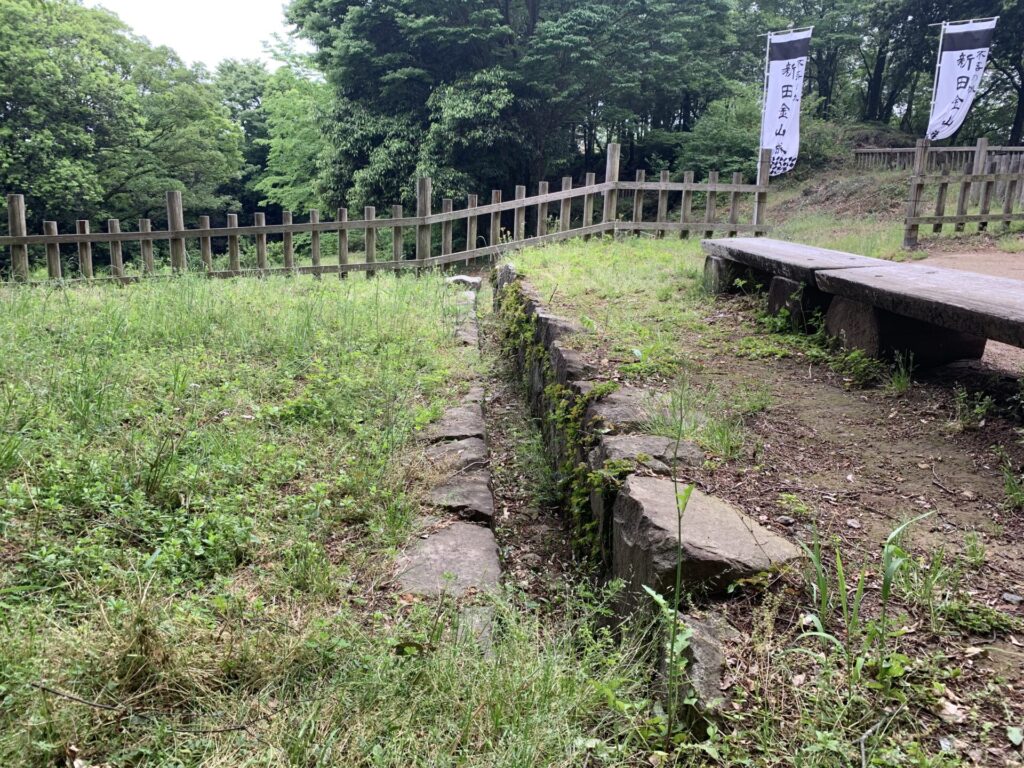
It appears that the Baba Kuruwa(馬場曲輪) even had a properly constructed drainage channel.
The fact that such features still retain their shape today is deeply impressive and gives a strong sense of the castle’s original sophistication.
Now, at last—through the main entrance (Ōte Koguchi) and onward to the Honmaru!
After passing through the Baba Kuruwa, we now finally head toward the Honmaru(本丸:main enclosure).

Take a look at this winding path.
It appears to lead to the koguchi (虎口:fortified entrance).
The term koguchi refers to a gateway through which soldiers moved in and out of the castle.
Originally, it was written with characters meaning “small opening” (小口:koguchi), but over time, the characters were changed to “tiger’s mouth” (虎口) to give it a more formidable impression.
In most cases, a koguchi was designed to block or slow enemy intrusion.
The approach would be deliberately bent or angled, and in mountain castles, it was often placed along steep slopes to make an attack even more difficult.
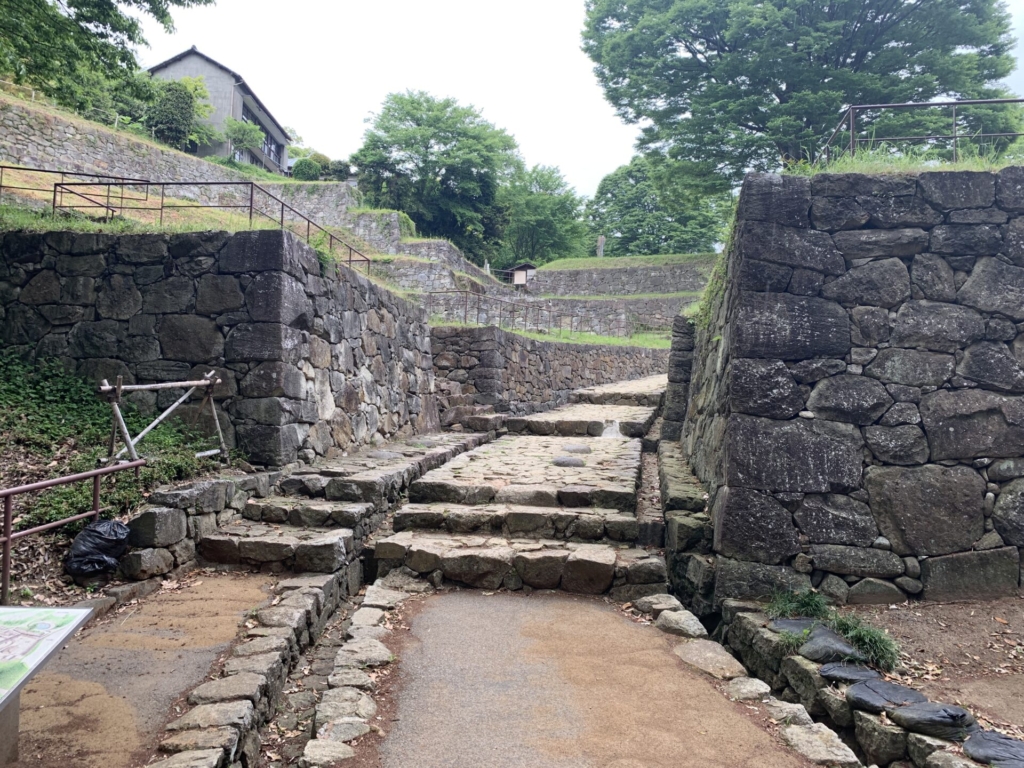
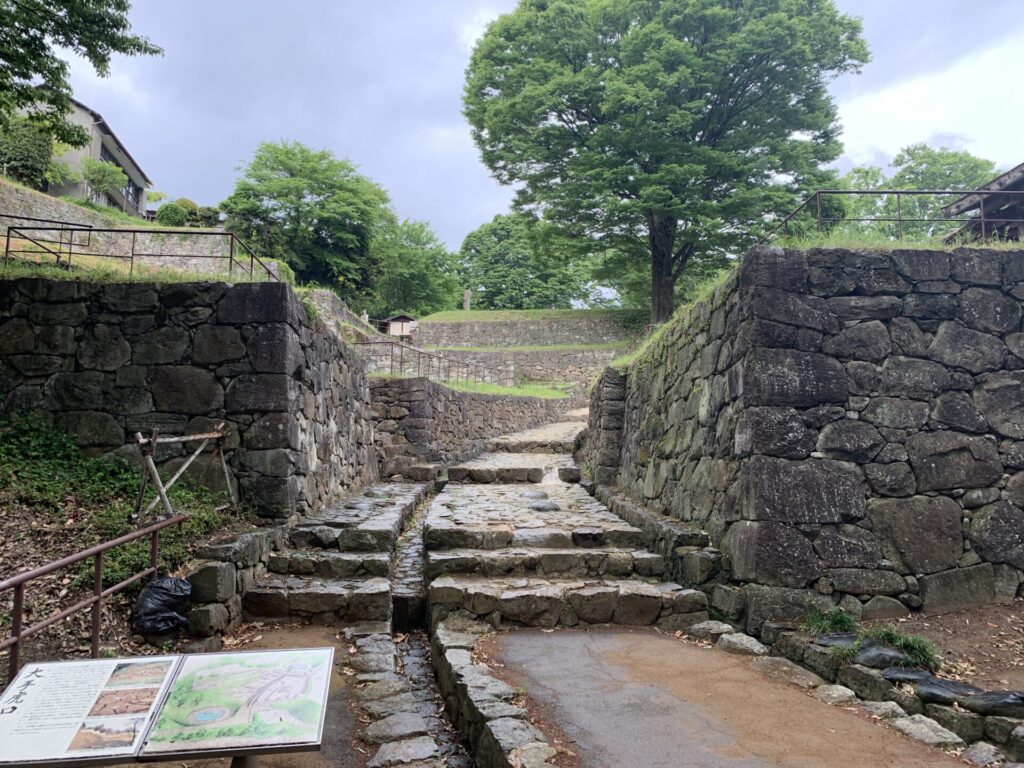
This is the main entrance—the Ōte Koguchi(大手虎口)!!
Just look at the sheer power of these stone walls!
Any attacking force would have been overwhelmed by this sight alone.
I couldn’t help but stand there for a moment, simply taking it all in. 😊
Looking more closely at the stone walls,
you’ll notice that smaller stones are packed between the larger ones.
These are known as mazume-ishi(間詰石)—filler stones used to reinforce the wall by tightly filling the gaps between larger blocks.
Now, please watch a short video showing what lies beyond the Ōte Koguchi.
First, we’ll step into the inner enclosure.
We have now reached the Ōte Koguchi North Lower Enclosure(大手虎口北下段曲輪).
From this position, defenders would likely have been able to fire arrows down at approaching enemy troops.
It’s clearly a commanding vantage point, allowing them to look down upon attackers below.
Even the stones forming each step feel rugged and imposing—it adds to the intensity of the atmosphere.
From here, we climbed even higher and looked down at the Ōte Koguchi from atop the earthen rampart.
Please take a look at the video of that view as well.
The view from atop the earthen rampart is equally impressive.
Standing here, defenders would have been able to observe enemy movements below with remarkable clarity.
Now, let’s head toward the Honmaru(本丸:main enclosure)! 🏯
As we walk toward the Honmaru,
a set of stone steps comes into view ahead.
That must be the way forward.
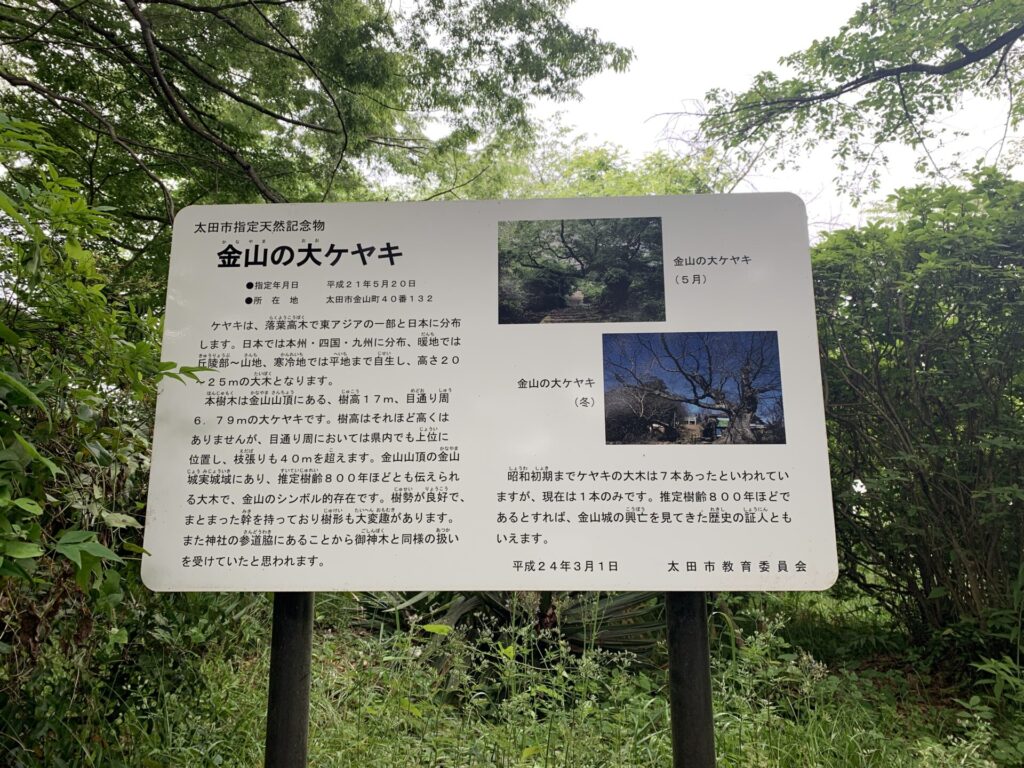
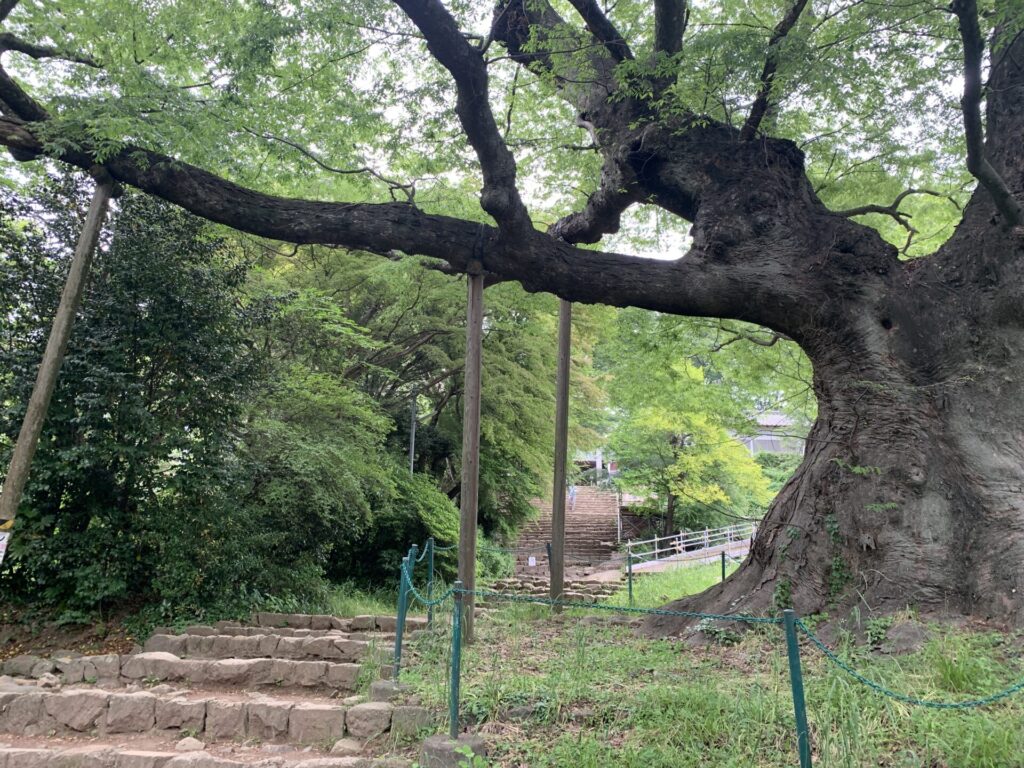
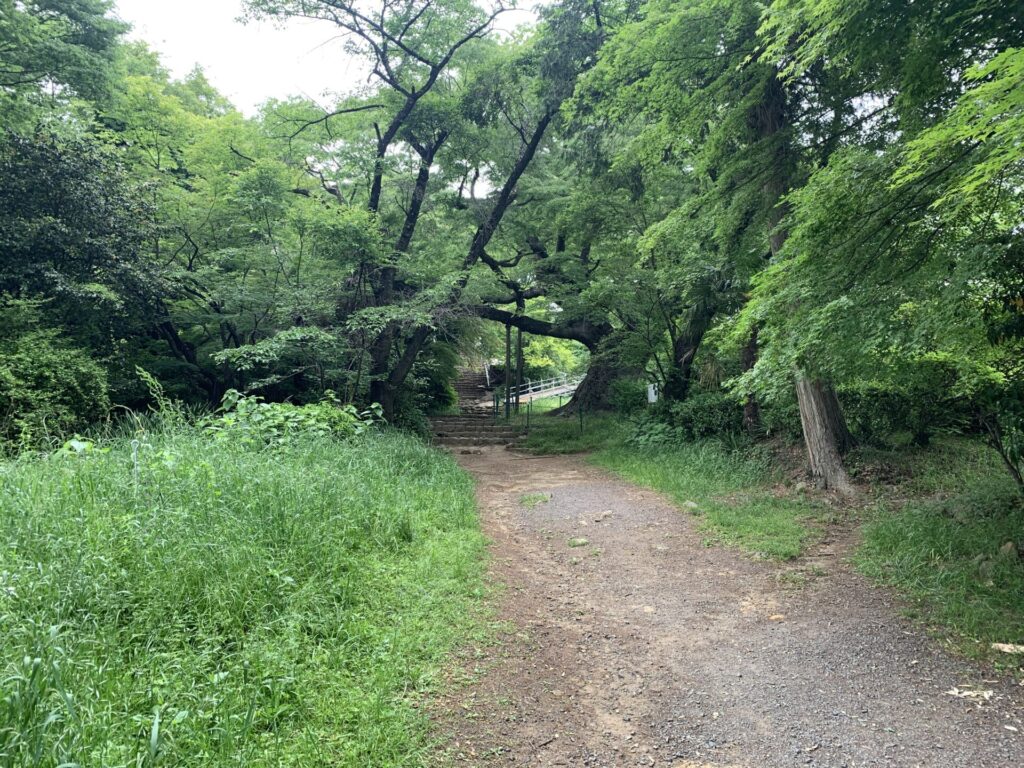
When exploring castle sites, you almost always come across large, old trees like this.
They have likely been preserved along with the castle grounds over the centuries.
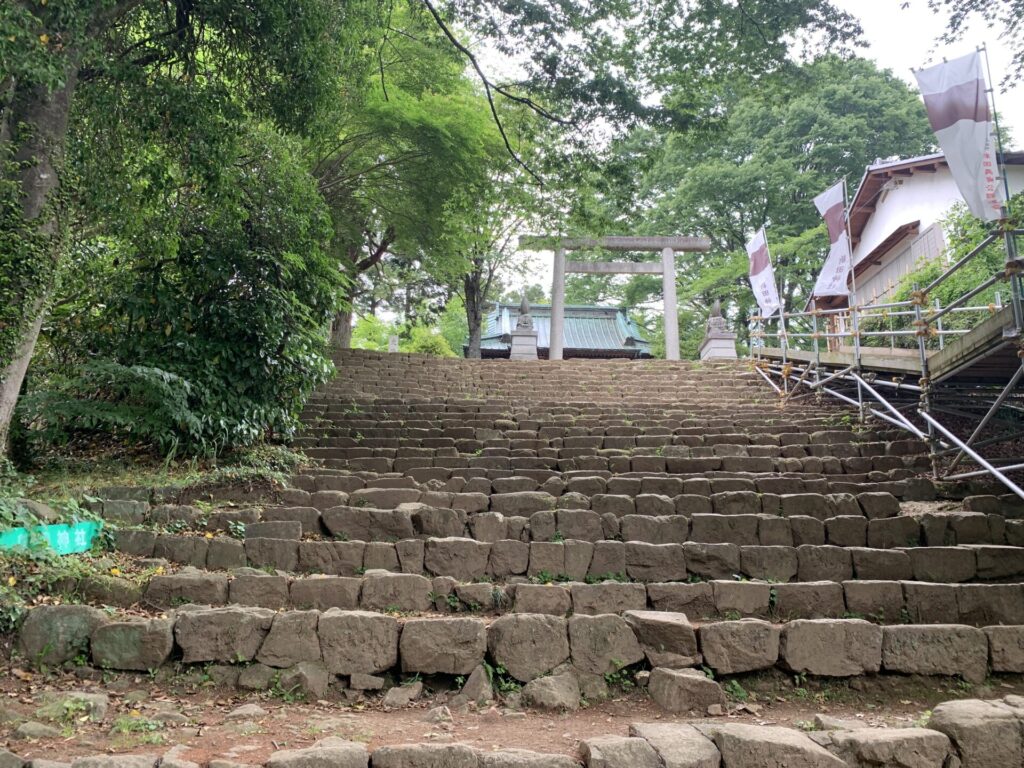
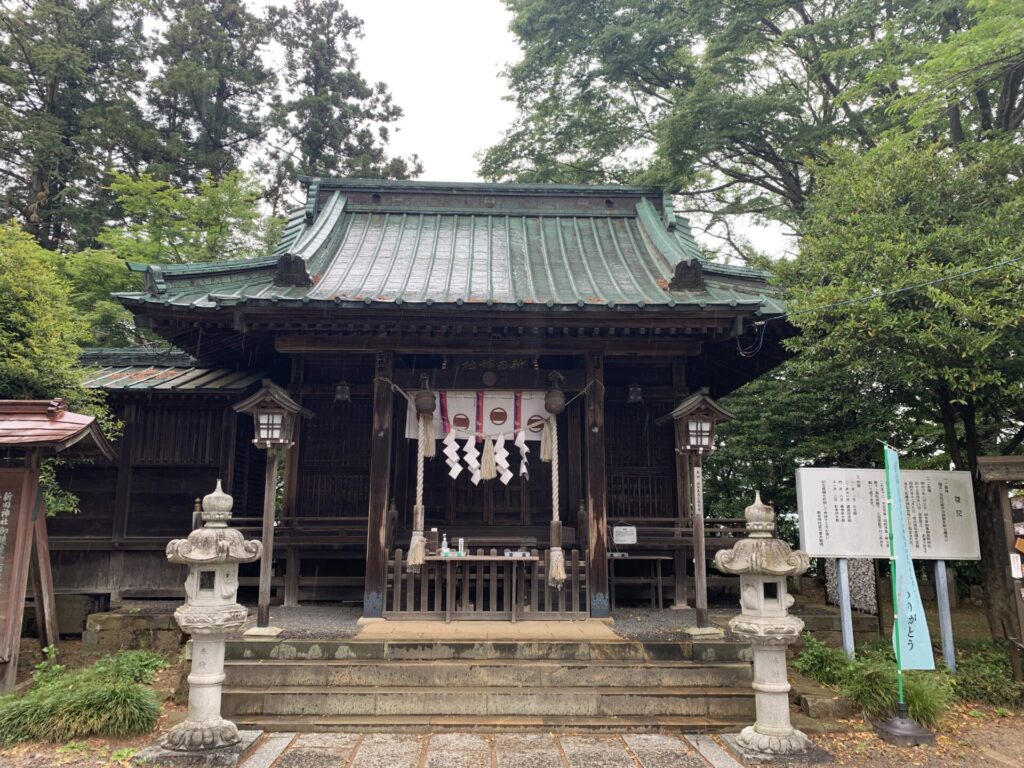
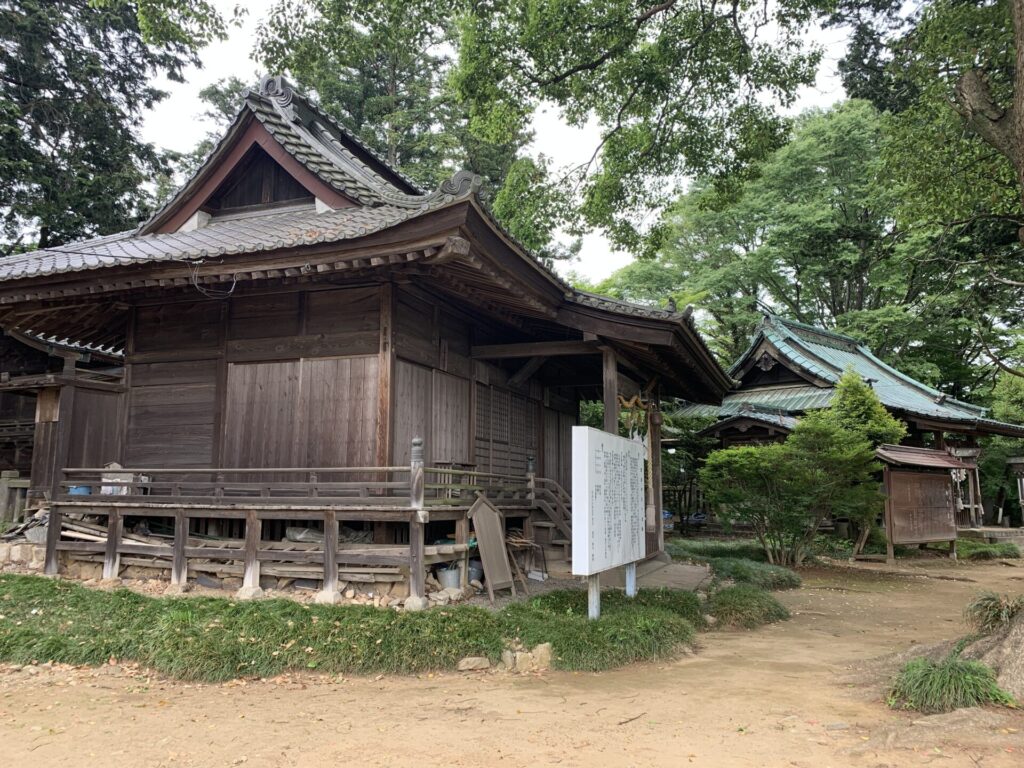
It appears that the Honmaru(本丸) once stood at the site where this shrine now stands…
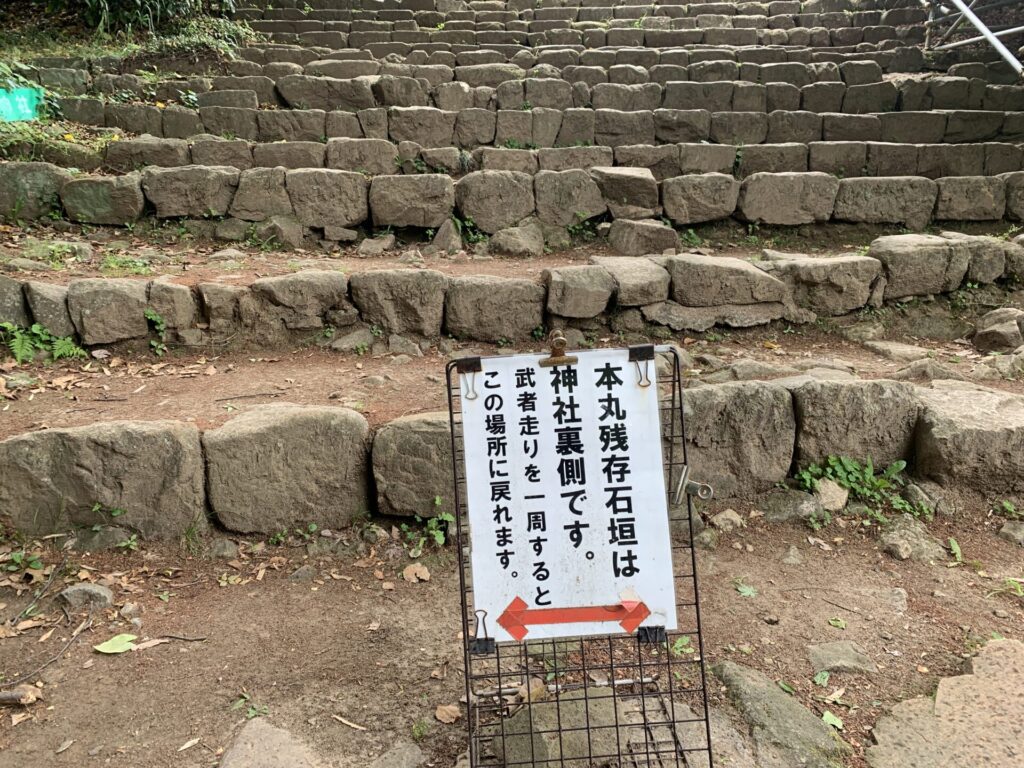
“Remaining Stone Walls of the Honmaru!!(本丸残存石垣)”!!
“Musha-bashiri (武者走り:warrior’s passage)”!!
The moment I spotted these words—enough to stir any Sengoku enthusiast’s heart—I couldn’t resist heading there first. 😅
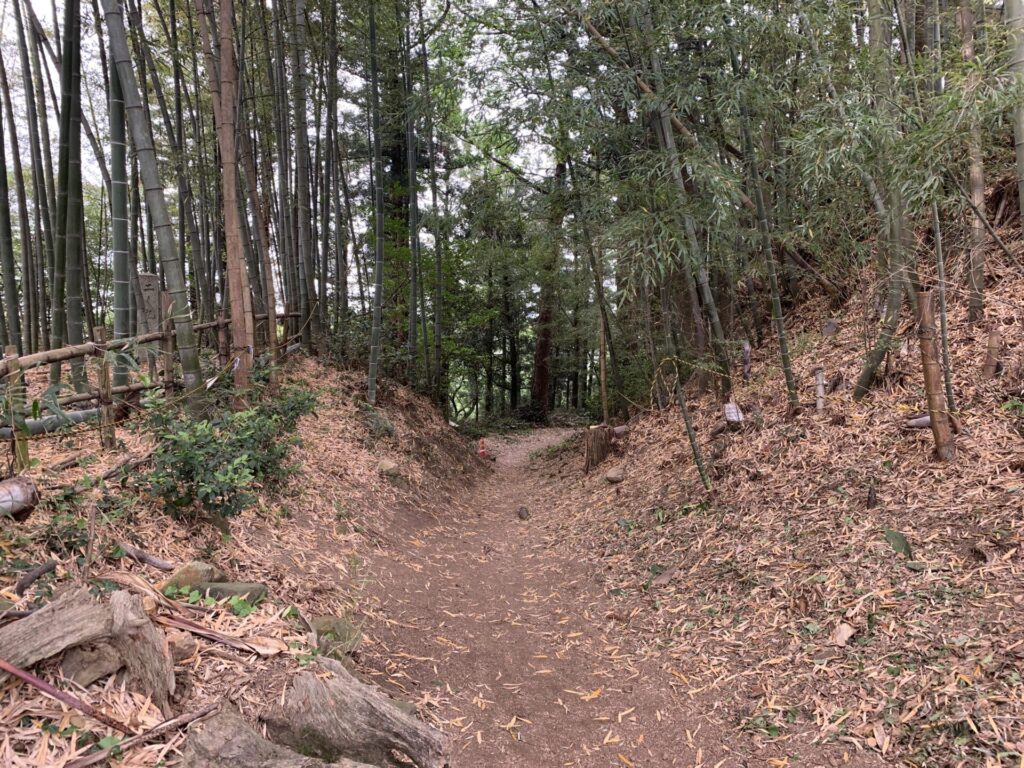
Let’s head behind the shrine!
We’ll follow this path, surrounded by bamboo groves.
Oh!
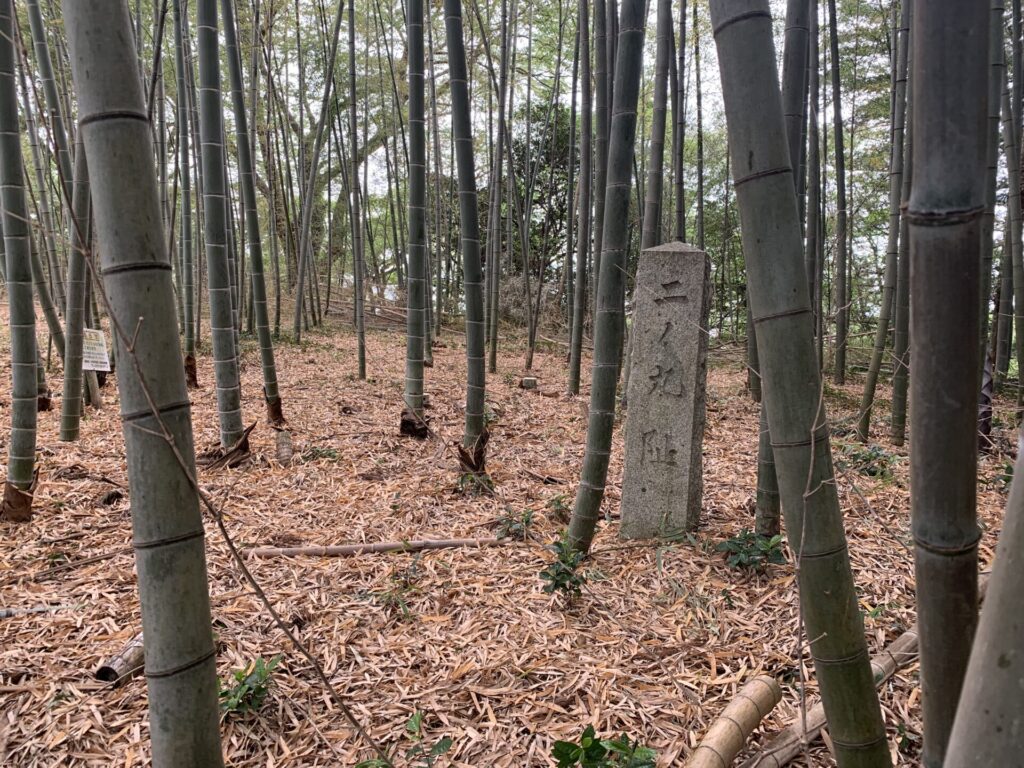
On the left side of the bamboo grove, there’s a stone marker indicating the site of the Ninomaru(二の丸:second enclosure)!
I almost missed it…
When exploring castle ruins, there are often subtle markers like this that can be easy to overlook—so it’s important to stay attentive.
And when we head almost directly behind the shrine…
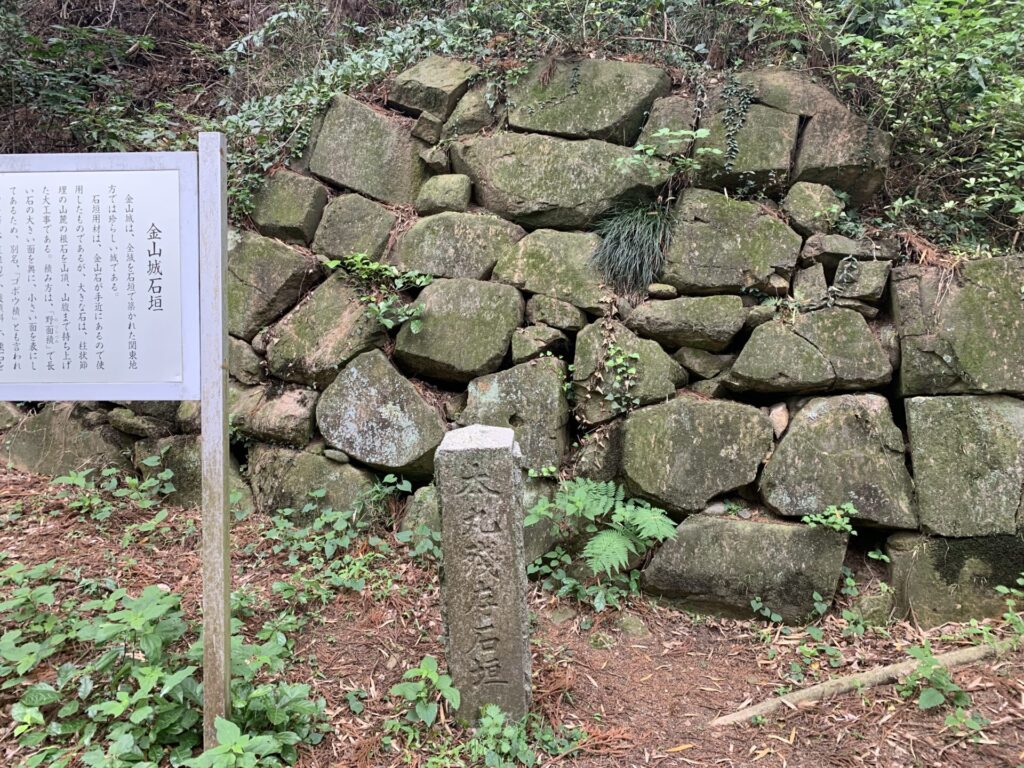
There it is—the remaining stone walls of the Honmaru!!
You can also spot mazume-ishi (間詰石:filler stones) scattered among the larger stones here, reinforcing the structure just as we saw earlier.
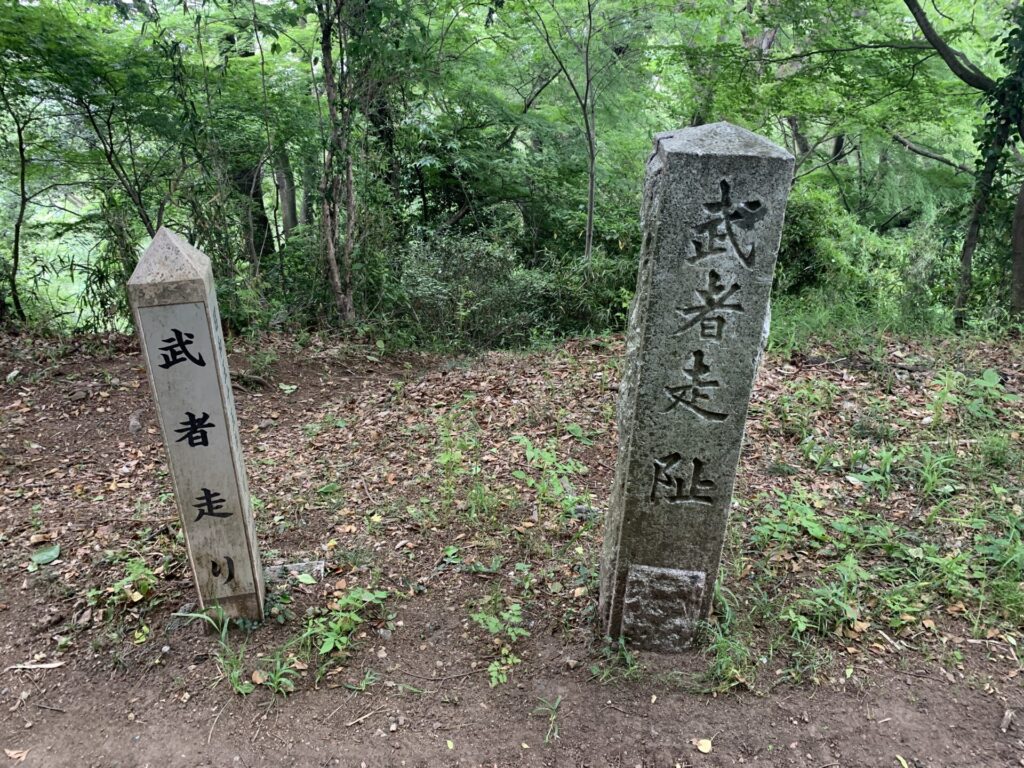
And here is the stone marker indicating the site of the Musha-bashiri (武者走り:warrior’s passage).
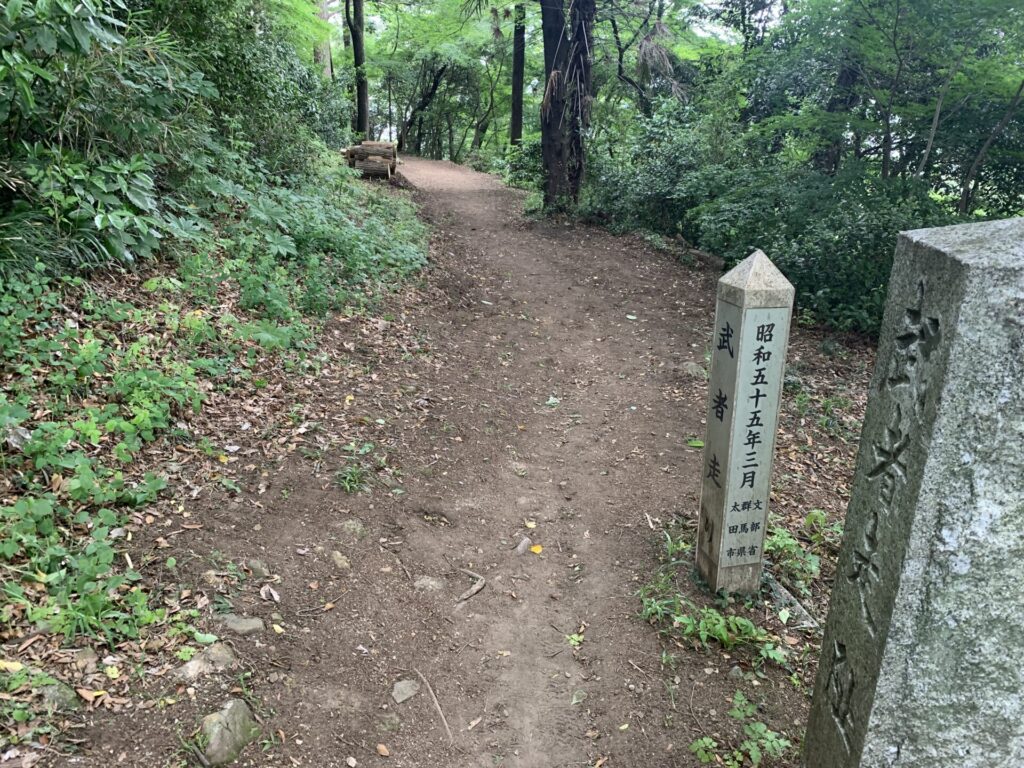
I see—so behind the Honmaru, there once existed a musha-bashiri like this.
A musha-bashiri was thought to be a concealed passage used by soldiers within the castle.
In times of emergency, it allowed them to move quickly to relay important information, while also providing a hidden position from which to launch attacks against approaching enemy forces.
After making a full circuit around the rear of the Honmaru,
we finally return to the shrine that now occupies the former main enclosure.
From here, heading to the right…
“Guardian Deity of the Minamoto Clan — Hachiman Shrine.”
“Nitta Yoshisada.”
The words I had noticed earlier on those vertical banners now make sense.
So this is where the name “Nitta Kanayama-jo” comes from.
Now, please take a look at a short video showing the current state of the Honmaru area.
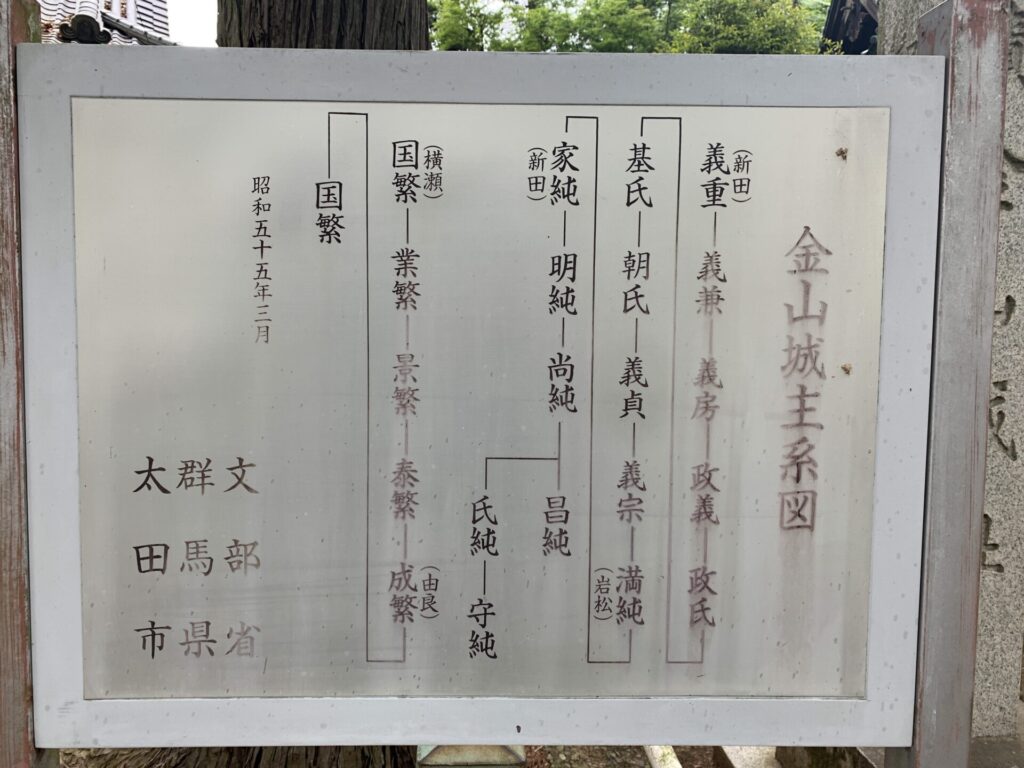
Beside the shrine, there is a genealogical chart listing the successive lords of Kanayama-jo.
After originating with the Nitta clan, the castle’s control eventually passed to the Yokose clan—who later changed their name to the Yura clan during the Sengoku period.
It was Yura Shigenari who is said to have defended Kanayama-jo against Uesugi Kenshin during the turbulent wars of that era.
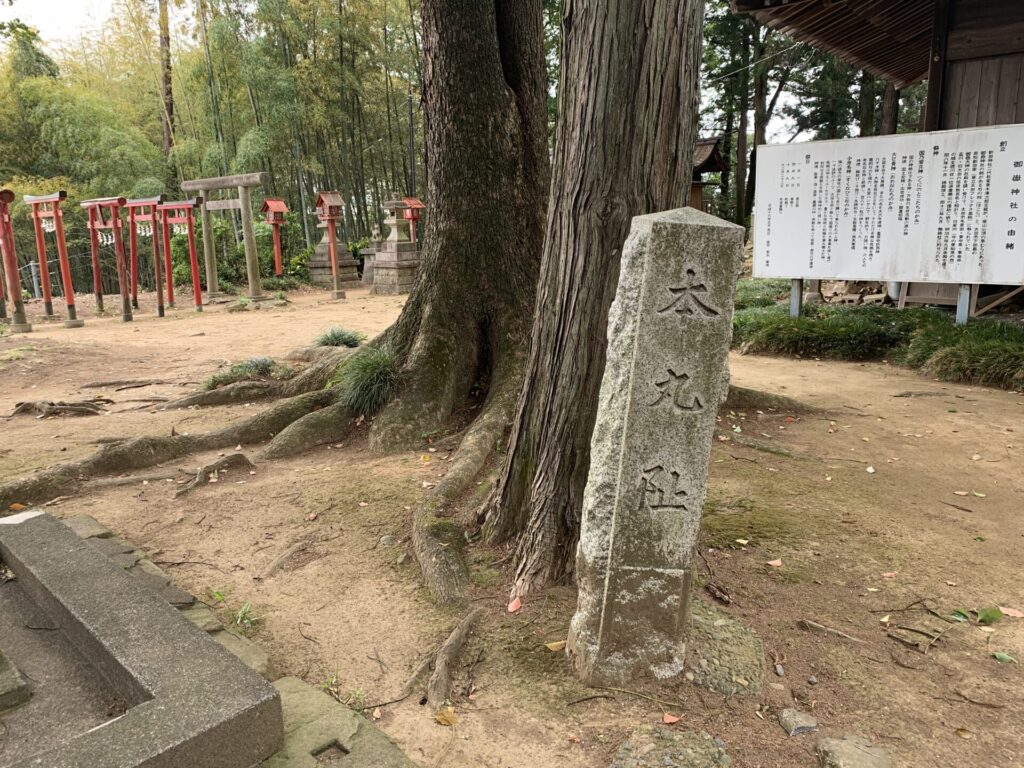
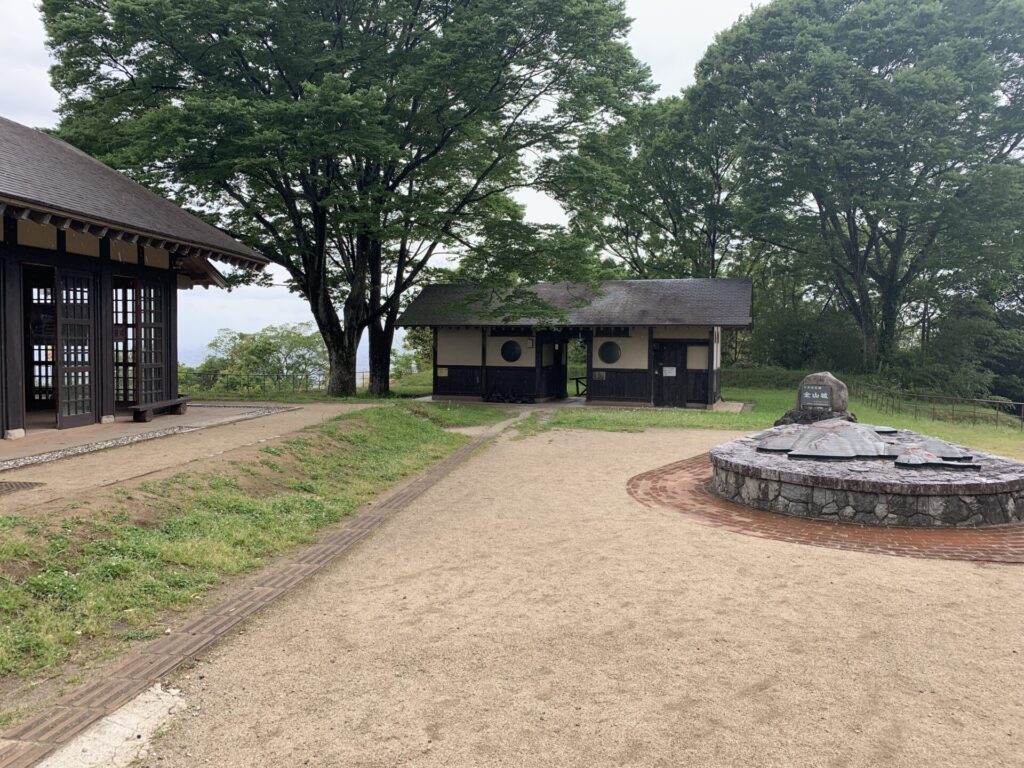
Here stands the stone marker for the “Honmaru Site”(本丸趾).
In the background, you can see several torii gates lined up beyond it.
It’s an impressive setting, indeed.
The grounds themselves are quite spacious as well.
After finishing our inspection of the Honmaru,
we descend the stone steps and head next toward the Minami Kuruwa (南曲輪:South Enclosure).
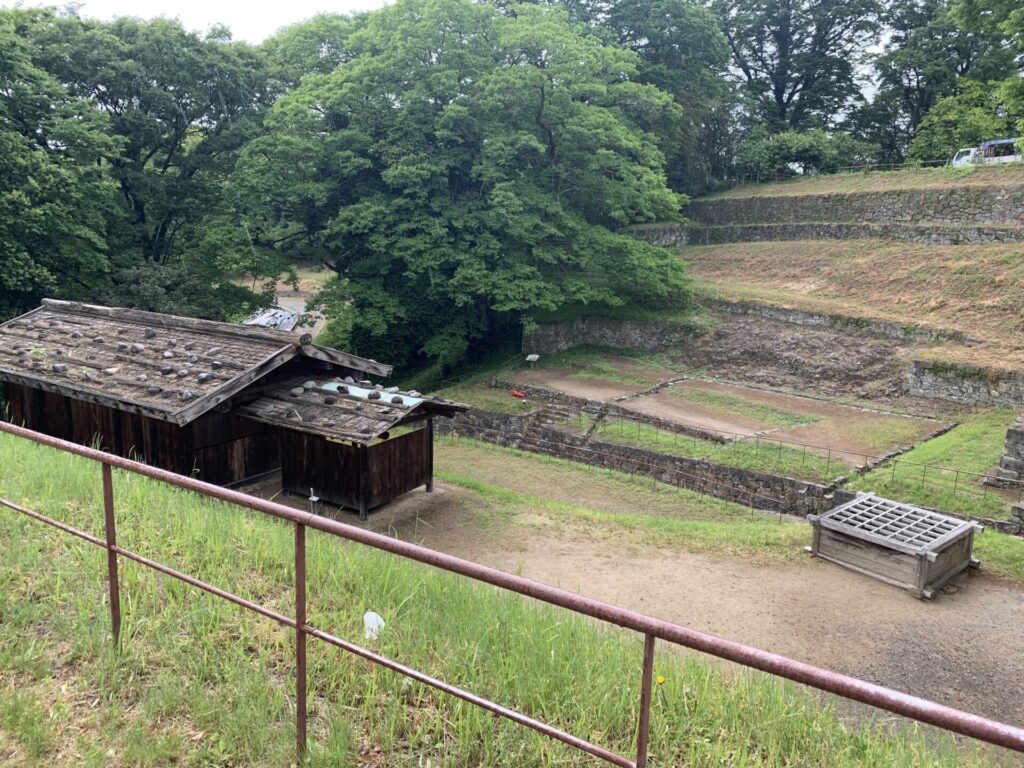
Below the Minami Kuruwa(南曲輪), more grounds come into view.
There even appears to be something resembling a residence.
Let’s take a closer look there as well.
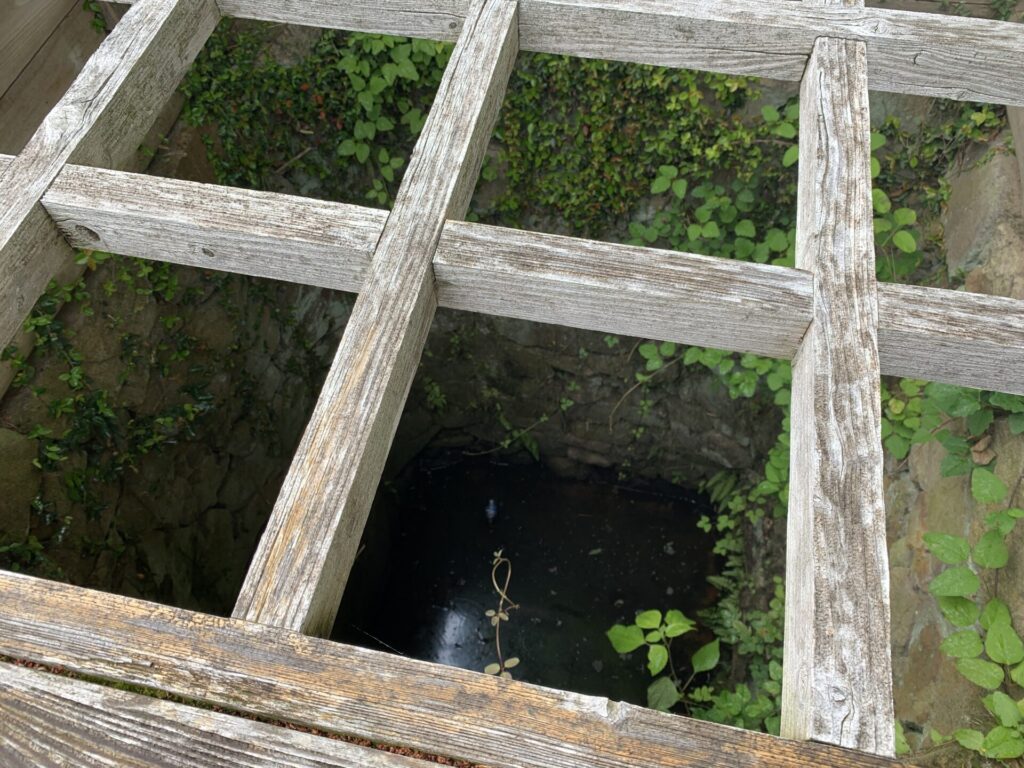
This enclosure also contains the remains of a well.
It offers a glimpse into the daily lives of the warriors who once lived here.
There are also traces of what appear to be old hearths.
Please watch the video to see more details of these living-area remains.
Surrounded by stone walls on all sides…
It feels less like a simple castle ruin and more like a true fortress.
I truly enjoyed every moment of this visit.
After taking one more look at the impressive Ōte Koguchi(大手虎口), it was finally time to head back.
By the way, when viewed from below, the horikiri(堀切) behind the Baba Kuruwa(馬場曲輪) looks like this.
Deep. Wide.
The phrase “Impregnable Castle” written on the banners makes perfect sense now.
Kanayama-jo truly deserves to be called a heavily fortified stronghold.
Every step of the exploration was filled with excitement and awe.
If you’ve ever wanted to experience a genuine mountain castle, this is a place I highly recommend.
And if you have the chance to visit Gunma Prefecture, it is certainly worth adding to your itinerary.
Even if you’re not usually interested in castle exploration, this visit might just change your perspective.
Until next time! 🏯